
2.1.1.3. Patient side manipulators
Arm
The da Vinci Classic systems came with either 2 or 3 PSMs. PSM1, PSM2 and PSM3 are identical.
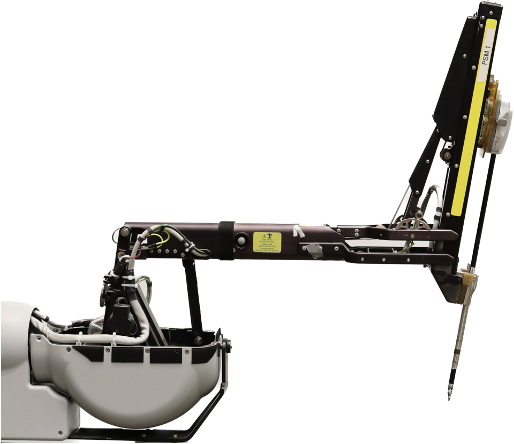
da Vinci Classic PSM
Basic information:
Each PSM arm is attached to the SUJ using 4 small screws. The mounting surface doesn’t have to be horizontal
7 motorized degrees of freedom, 7 actuators with optical encoders
All motors are located in the first 2 links and use cable transmission
All actuators have analog potentiometers, used for both homing and safety checks
The arm is designed with counterweights to stay as balanced as possible
The second actuator controls a mechanical parallelogram used to enforce a RCM point (remote center-of-motion, aka fulcrum point). Google search.
The full kinematic chain is composed of two parts, the arm’s base (not sterilized, 3 actuators) and a removable instrument (sterilized and disposable, 4 actuators)
There are many different types of instruments (graspers, needle drivers, scissors…).
With most instruments, the arm has 6 degrees of freedom and actuation for the instrument’s jaws. The first three degrees of freedom are in the arm’s base. The last three and jaws are part of the instrument
With most instruments, joints four to seven are controlled by multiple actuators (actuator to joint coupling matrix, instrument dependent)
The base arm has a connector to read a Dallas chip placed in the instrument. This is used to detect if an instrument is present and which type of instrument it is.
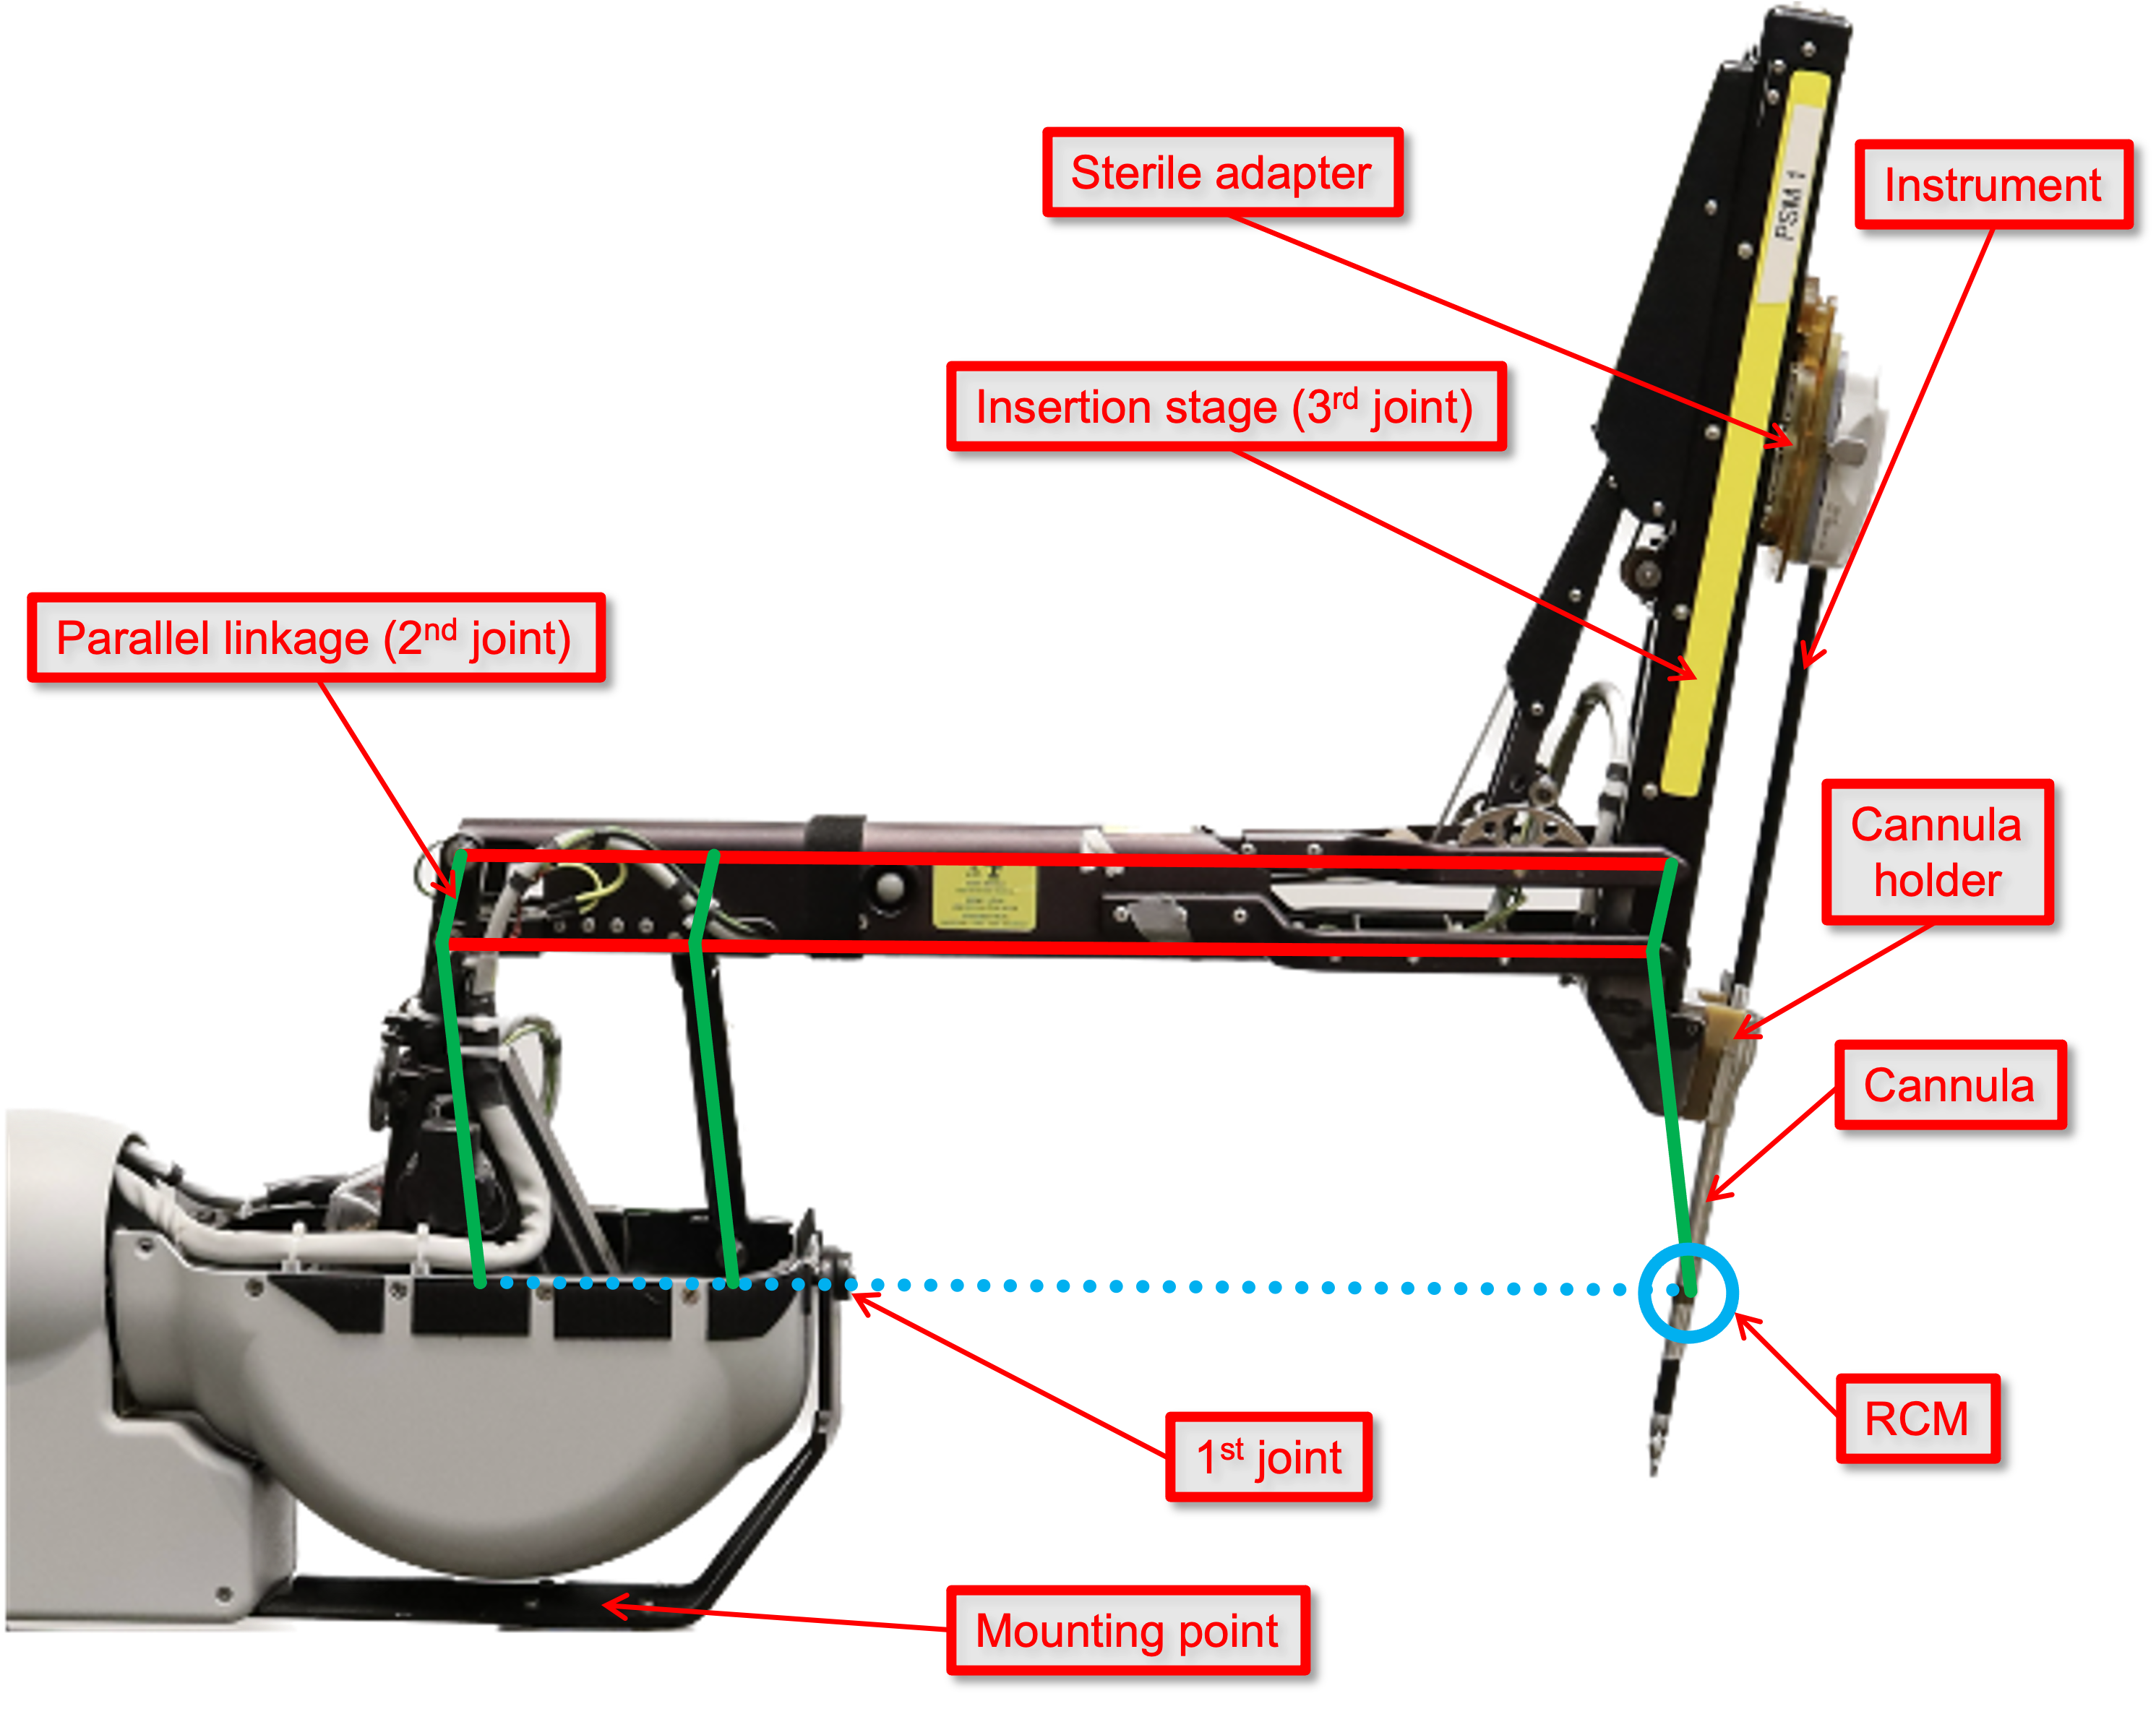
da Vinci Classic PSM labeled
Cannula and sterile adapter
Since the instruments are removable and there is a barrier (sterile drape) between the sterile and non-sterile area, there are 2 distinctive points where the instrument is in contact with the arm. The instrument is attached to the base arm at the top of the insertion stage and guided along the cannula (trocar) at the bottom of the insertion stage.
There is a video at the end of this section describing the process.
At the top of the insertion stage, we find the transmission mechanisms for the last 4 actuators. These are four rotating bars with two pins (at different distance from center).
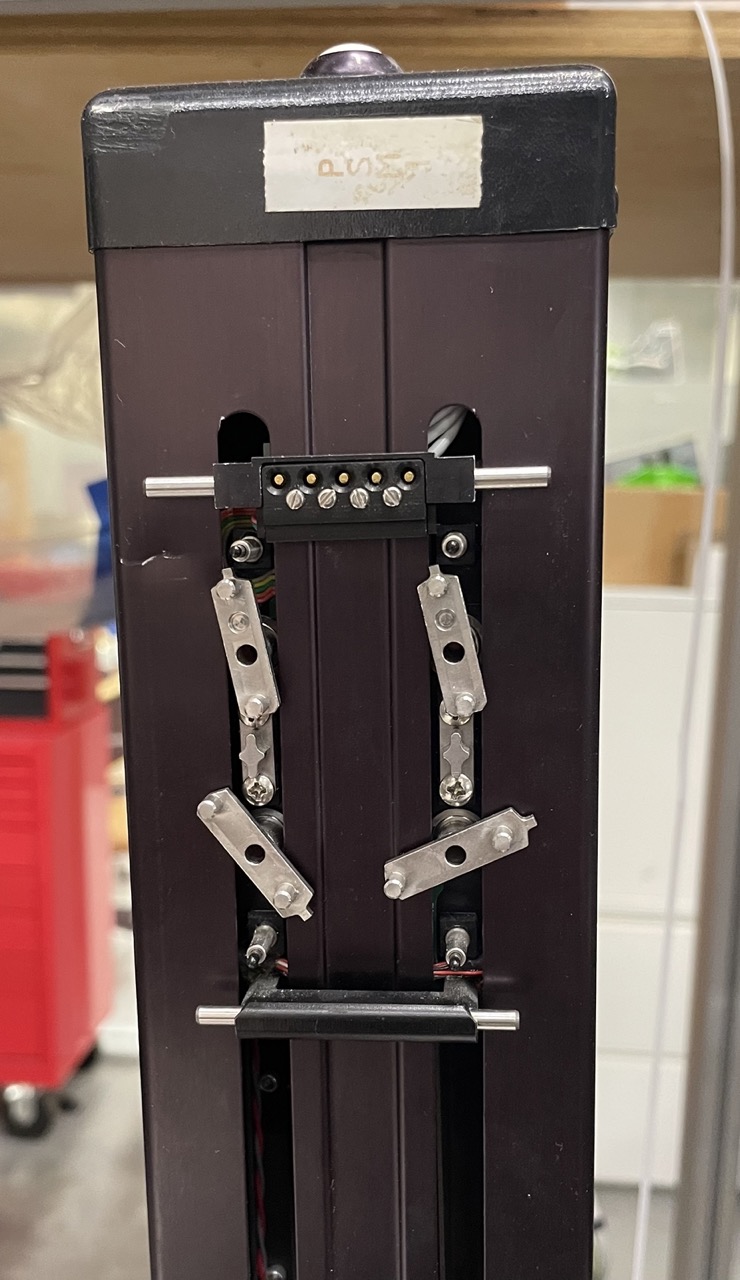
Last 4 actuators on PSM Classic base arm
When prepared for surgery, a sterile drape covers the whole arm. The drape has an opening for the sterile adapter. The sterile adapter comes taped to the drape. It is used to transmit the mechanical motion of the last 4 actuators as well as some electric signals to detect the sterile adapter as well as the instrument’s type.

da Vinci Classic PSM with sterile adapter (without drape)
When the adapter is detected by the controller, the last 4 actuators rotate back and forth until their pins get engaged in the sterile adapter’s 4 spring-loaded disks.
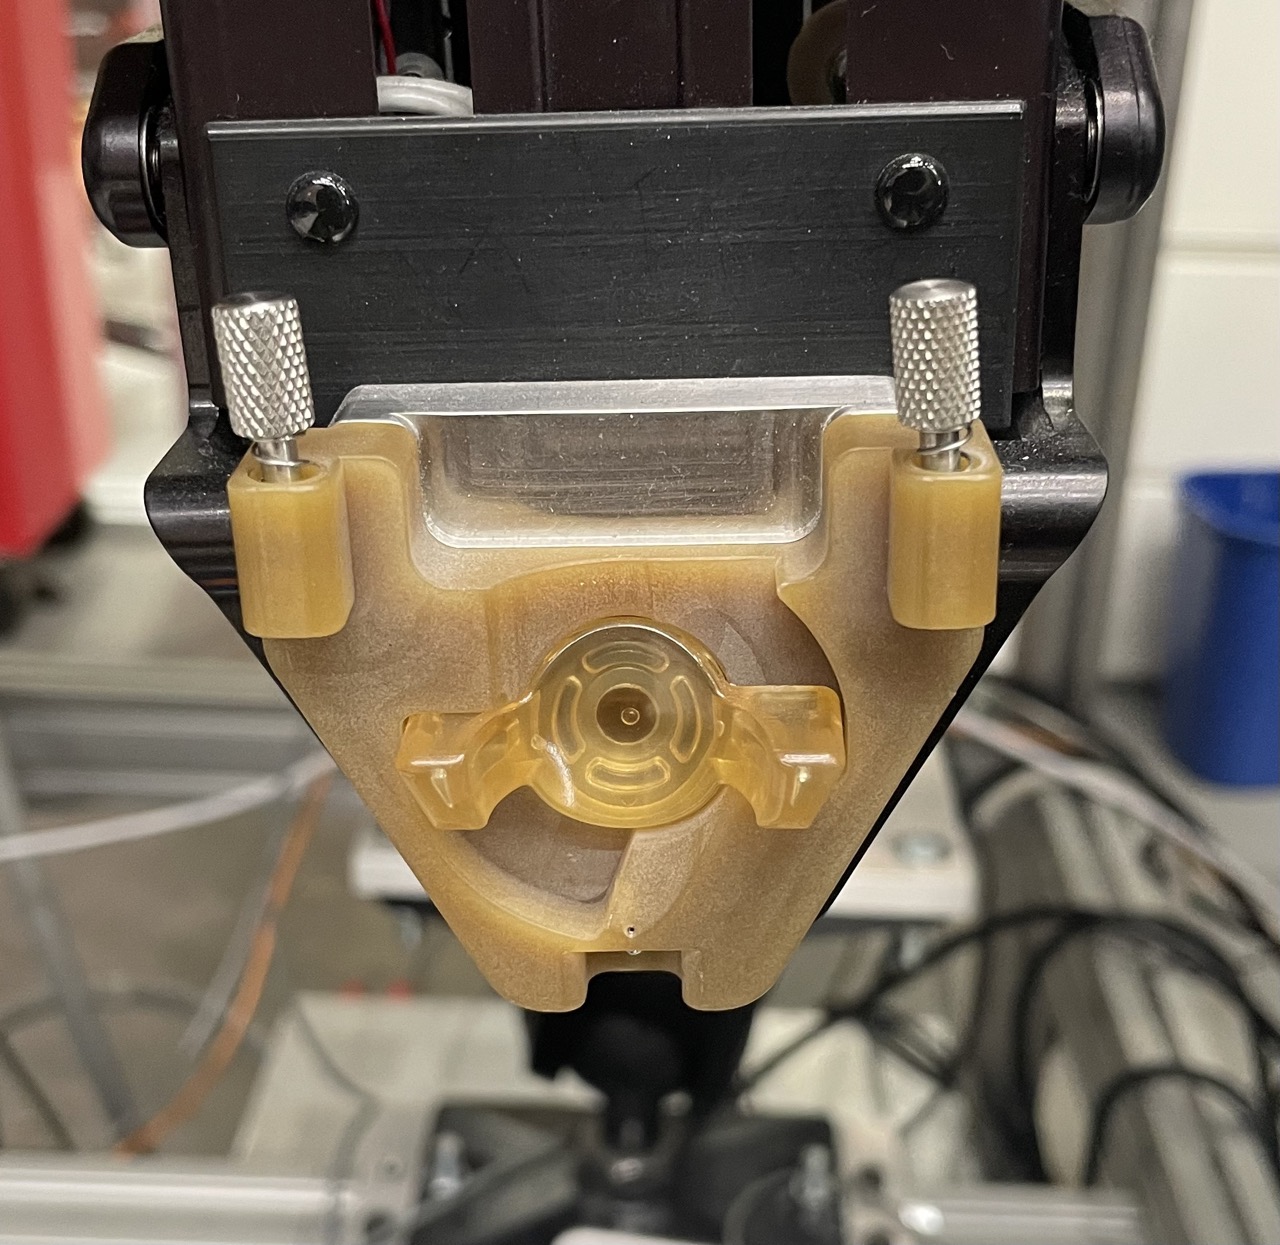
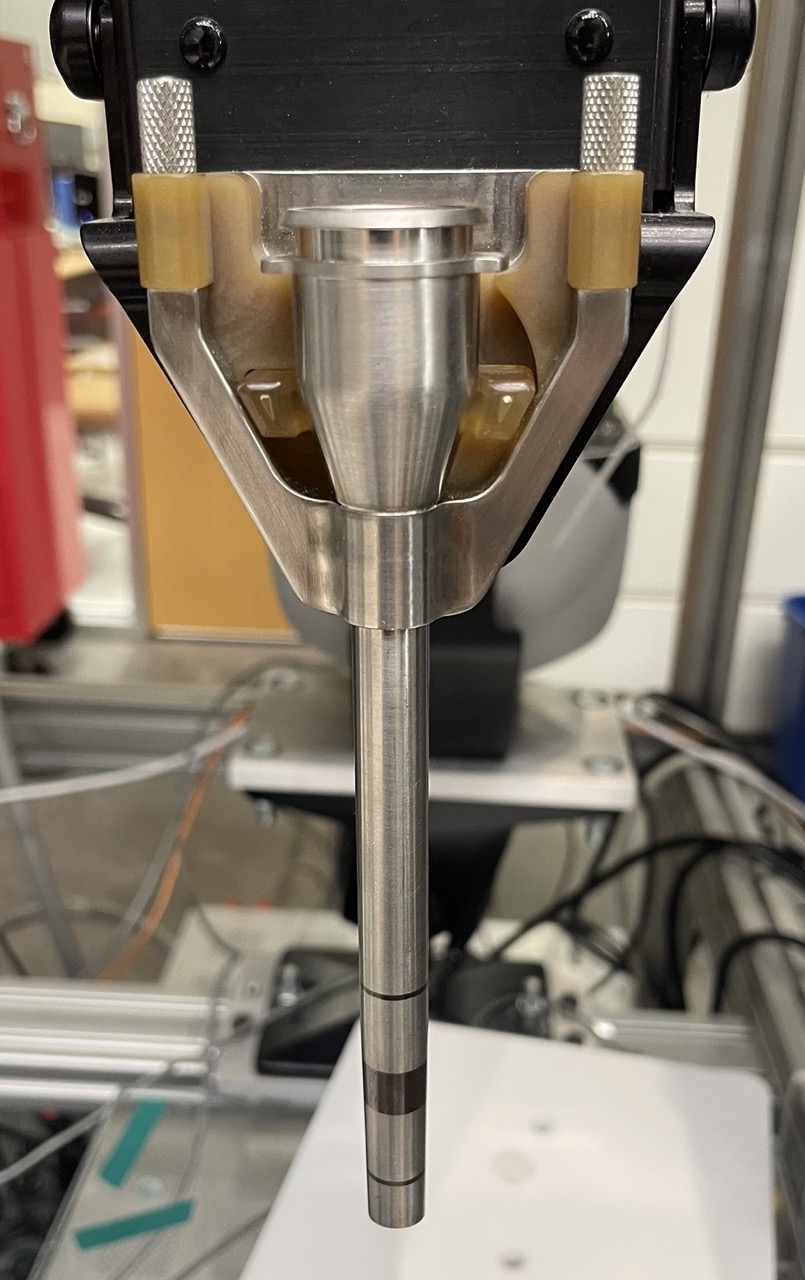
At the bottom of the insertion stage, a cannula is attached to the arm via a cannula holder. The cannula is long enough to guide the instrument through the RCM point, i.e. the point of entry in the patient.

da Vinci Classic PSM cannula holder
The cannula holder comes taped to the drape (second opening) and must be securely attached to the arm by turning the locking mechanism a quarter turn.
da Vinci Classic PSM cannula holder in place
The cannula is reusable and sterilizable. Cannulas come in different diameters, 5 mm, 8 mm… to match the diameter of the shaft of the instrument used.
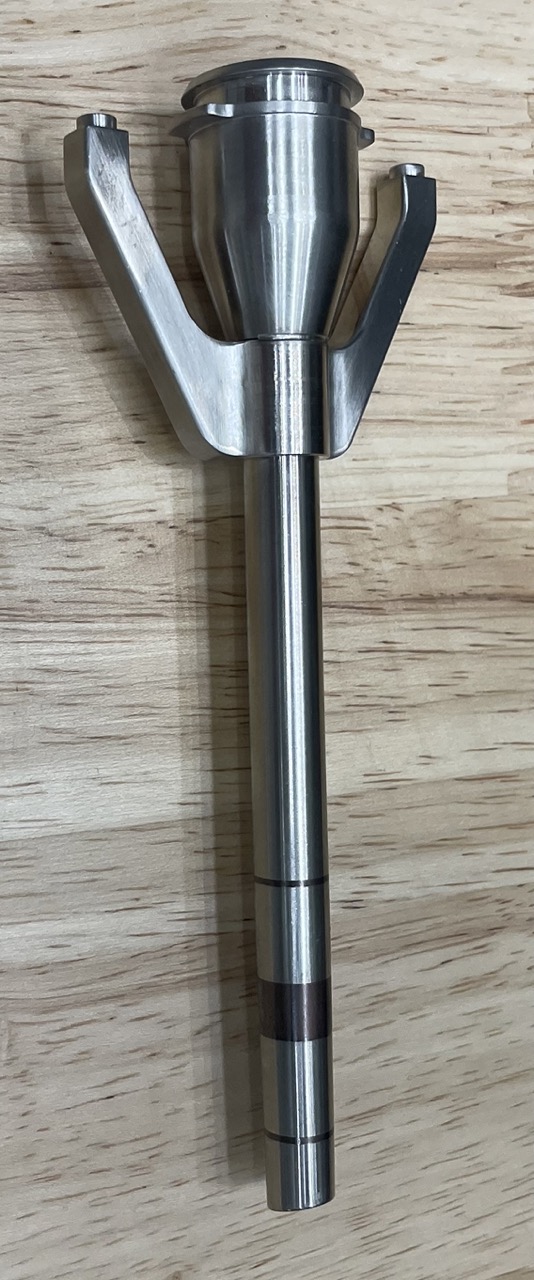
da Vinci Classic PSM 8 mm cannula
The cannula is held by the cannula holder (shocking) and secured using two thumbscrews. When in place, the large black strip etched on the cannula indicates the approximate position of the RCM point.
da Vinci Classic PSM cannula in place
Note
Video on YouTube demonstrating how the PSM is prepared: https://youtu.be/yeQKU2_O6uo