Homing, i.e. they provide an absolute reference to define the zero
position
Safety, i.e. by reading both encoders and potentiometers
continuously one can detect discrepancies
The potentiometer values are read as voltages and converted to SI
positions (radians for revolute joints and meters for prismatic
joints). The conversion is a linear function based on an offset and a
scale, i.e. position=offset+scale*voltage. Intuitive
Surgical performed an initial calibration for all arms and can provide
these values in a .cal file. Using these .cal file and the
dVRK config generator, we get the IO JSON
sawRobotIO1394-<arm>-<serial>.json files used for the dVRK. See
configuration generators.
The problem is that these values are partially based on the
electronics used during the calibration. As such, they are a bit off.
We developed two different strategies to calibrate the scales and
offsets.
For the scales, the simplest solution is to rely on the encoders. We
generate a large motion on each actuator and collect both the encoder
and potentiometer values.
For the offsets, it is a bit more challenging since we need to
identify a zero position based on mechanical properties.
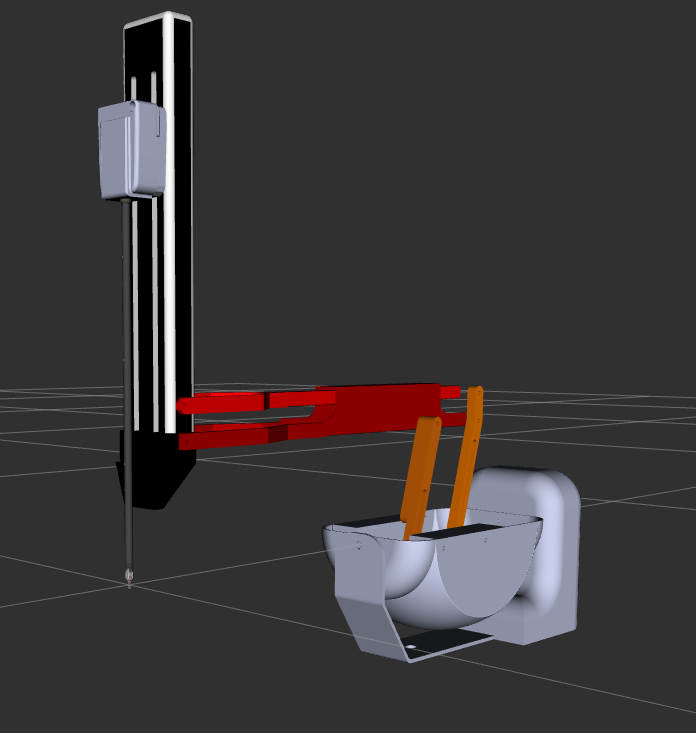
The zero position can be visualized using the dVRK in kinematic
simulation mode with RViz. To do so, launch roslaunchdvrk_modelarm.launchgeneration:=Classicarm:=ECM for the ECM zero. You
can replace ECM by PSM1, MTML or MTMR to visualize
the zero position of different arms.
For the calibration process, you need to hold the arm in zero
position. You can do this with the arm powered or not. When
powered, you can use the GUI arm widget to control the joints
position and get the arm closed to the zero position (introduced in
dVRK 2.0).
This page contains a simple solution to calibrate the potentiometer
offsets for the PSM last 4 actuators. We also provide a method to
calibrate the PSM 3rd potentiometer
<calibration-classic-pots-depth>.
Warning
It is important to calibrate the potentiometer scales before the
offsets!
Note
If your original calibration files are way off, the original offsets might prevent the dVRK from working (even with the -C option). You might have to do a rough offset calibration to get an initial position closer to zero.
For the ECM, make sure the brakes are properly calibrated. This
requires to calibrate both the controller current (see above) and the
power to release the brakes.
As for the other calibration steps, you need to have all the
configuration files generated, the C++ code compiled and the current
calibration performed. Furthermore, the current implementation
requires the ROS bridges and Python. Make sure you compiled your dVRK
software stack using catkin or colcon (see
compilation).
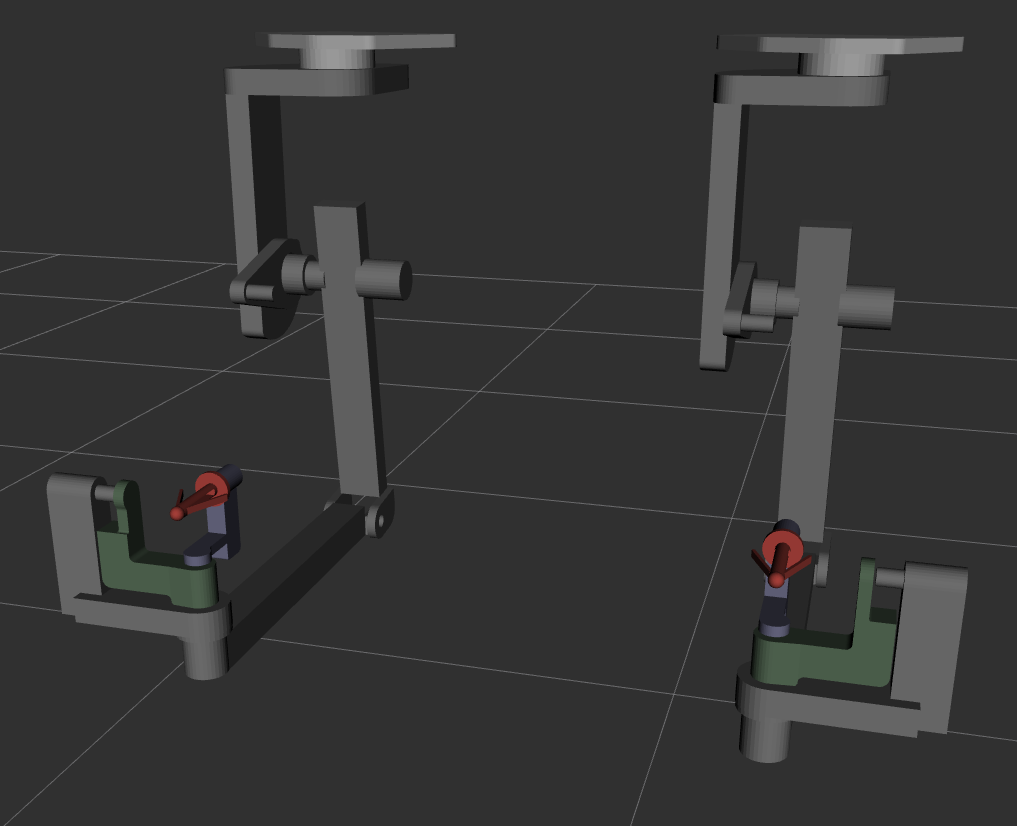
For the offsets, we need a physical mechanism to maintain the arm in
zero position (or any known position). We currently have a fairly
easy solution for the last 4 joints of the PSM. The four metal
bars/gears are in zero positions when aligned. We tried different
methods and got similar results, so you should use whatever is the most
convenient for you:
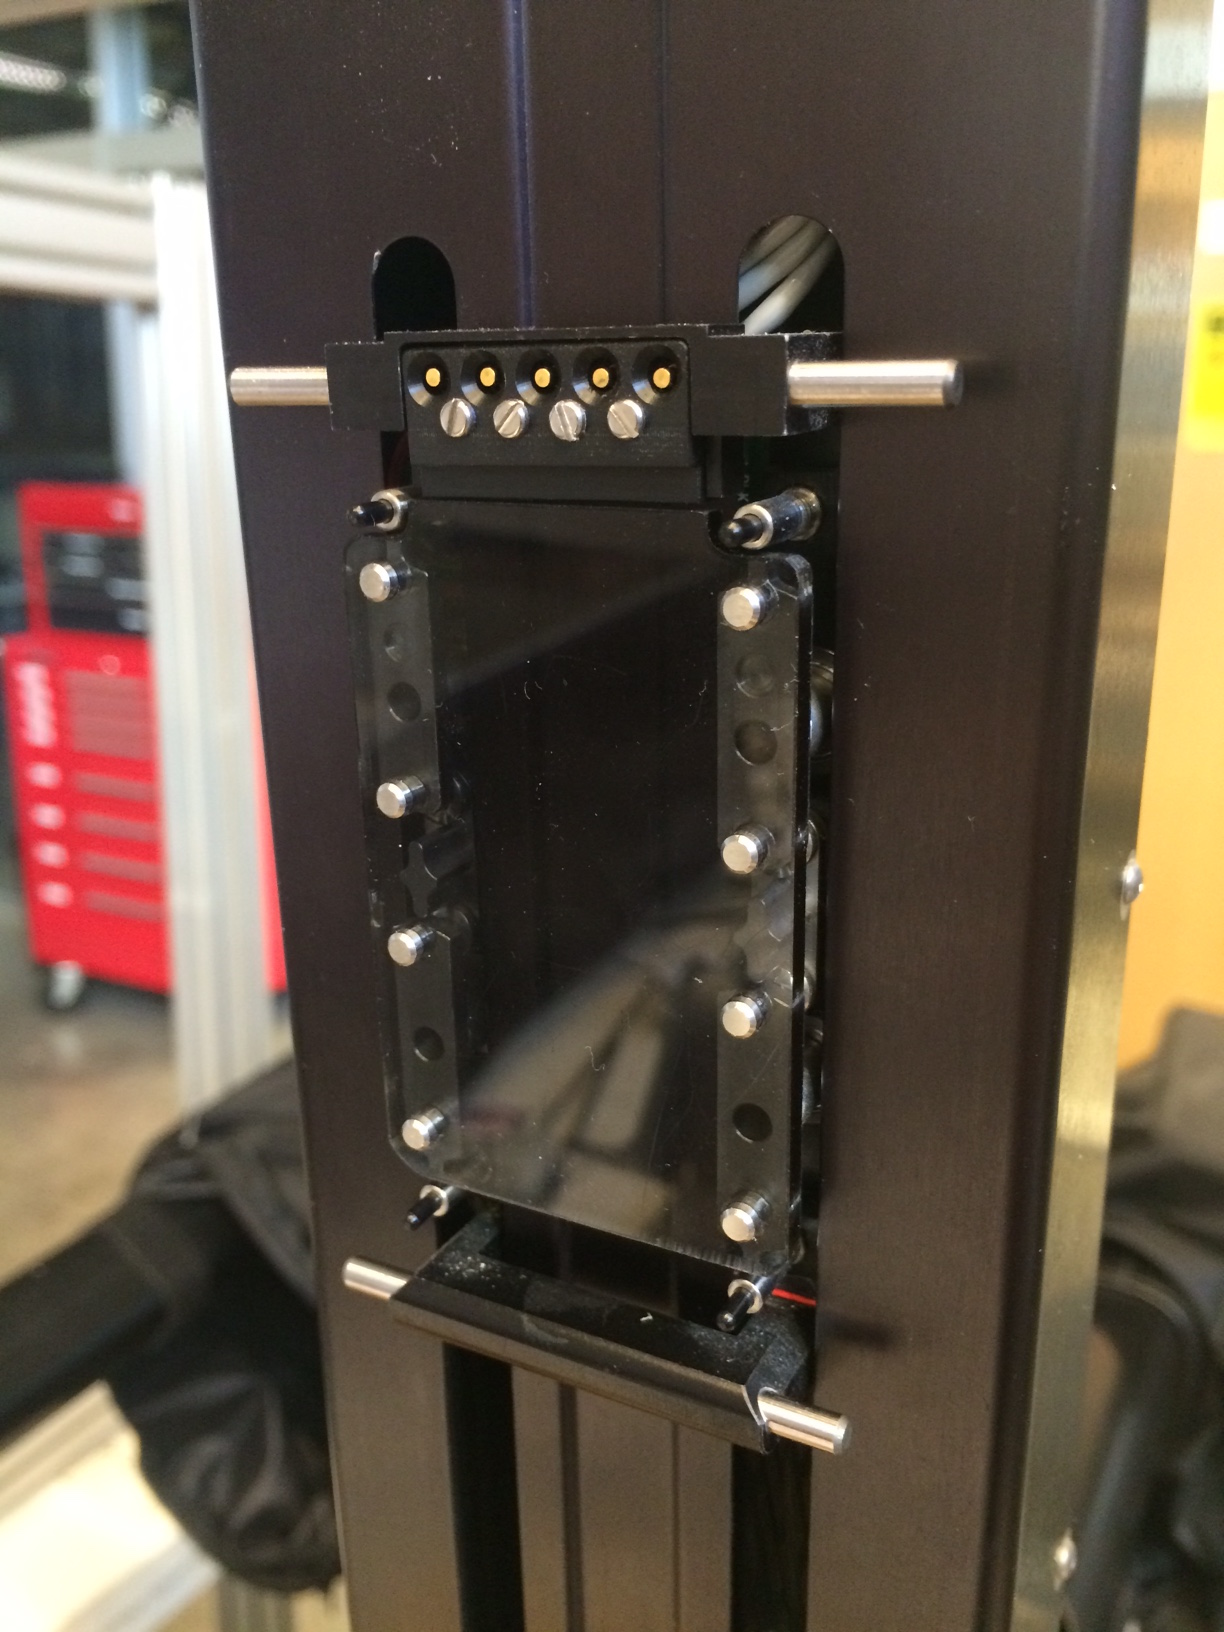
Calibration template made of plexiglass plate with holes for the
pins on the 4 wheels.
These instructions are for all arms, PSMs, MTMs and ECM. For the
calibration, one needs to start the dvrk_system application
for the arm to be calibrated (see dVRK system).
Since we also need the low level data (potentiometer values), we have
to provide the -K option. For example, to calibrate a PSM2,
command line options for dvrk_system should look like:
# In directory <my-config-dir># directory with your sawRobotIO1394-PSM2-00000.json configuration files
rosrundvrk_robotdvrk_system-j<my-config-dir>/system-PSM2.json-K-C
Note
The -C command line option (added in release 2.0.1) allows to
run the dVRK system without the potentiometer safety checks
(Calibration mode). Otherwise, with very poorly calibrated
potentiometer parameters, the application would keep shutting down,
preventing users to calibrate their potentiometer parameters.
The file system-PSM2.json is specific to each system since it
points to your sawRobotIO1394-PSM2-00000.json file.
# In directory <my-config-dir>
rosrundvrk_pythondvrk_calibrate_potentiometers.py-tscales-aPSM2-csawRobotIO1394-PSM2-00000.json-iIO1
Make sure you use the same sawRobotIO1394-XXX-00000.json for the
calibration script and the system application! The file name can be
found in the system-PSM2.json file you’re using.
The -i option is required and should match the IO name in the system JSON configuration file. The name is also used for the IO tab in the GUI.
The calibration script will query the arm serial number from the JSON
file and will display it. The system application will do the same
and display the serial number in the IO Qt widget. This ensures that
both applications are using an JSON file specific to the arm you are
trying to calibrate. But, if you happen to use different copies of
the configuration file for your arm, the current system has no way to
detect it. So, make sure you are using the same file for both
applications (system and calibration script).
You will have to acknowledge a few prompt messages, including a
warning regarding large motions during the calibration. The following
two videos can give you a sense of the space required around the arm:
Calibrating scales using encoders as reference
Values will be saved in:  pot_calib_scales_sawRobotIO1394-PSM2-00000.csv
To start with some initial values, you first need to "home" the robot.  When homed, press [enter]
Since you are calibrating a PSM, make sure there is no tool inserted.  Please remove tool or calibration plate if any and press [enter]
The robot will make LARGE MOVEMENTS, please hit [enter] to continue once it is safe to proceed
Caution
For the scale calibration, we try to use a wide range of positions, so the arm will pretty much go from joint limits to joint limits. Make sure there are no obstacles in the way!
In this case you can see corrections as high as 2% on the third joint
(index 2). Press y[enter] to save the results in a new JSON file.
You can review the changes with meld or your preferred diff tool.
Then stop the dVRK system application and restart it with the updated
JSON IO file to re-run the calibration script. The results should
improve:
These instructions are for all arms, but we only know how to properly
hold the joints at their zero position for the last 4 joints of the
PSMs. If you need to calibrate offsets on different arms (MTM,
ECM), you will need to figure out a way to constrain the arm to its
zero position (mechanical zero).
For the scales’ calibration, you first need to start the system
application and power the arm. If the arm can power with the existing
potentiometer offsets, home the arm. You can then either keep the arm
powered and use the motors to position it close to its mechanical
zero. For the ECM and PSM, when the arm is maintained in position
using its motors, you can use the “clutch” button to release the PID
controller and position the arm manually. For all arms, you can also
use the ROS topics to send move goals or use the Qt GUI (dVRK 2.0
and above). Once the arm is close to its mechanical zero position,
you can use the script below.
In a separate shell, start the calibration script using the following
command line:
# In directory <my-config-dir>
rosrundvrk_pythondvrk_calibrate_potentiometers.py-toffsets-aPSM2-csawRobotIO1394-PSM2-00000.json-iIO1
Follow the instructions and place the calibration template (either
Lego bars or plexiglass plate) when prompted to. The result should
look like:
For the MTMs or ECM, the script will save all joint offsets. For the
PSMs, since we know there is an easy way to calibrate the last 4 joint
offsets, the script will prompt you to figure out if you should save
all the joints or only the last 4. If you are using the Lego bars or
template describe above, DO NOT save all, just save the last 4.
Then stop the system application, make sure you restart it with the
updated JSON IO file and re-run the calibration script. The results
should improve: