3.3.2.3. PSMs
Note
You can skip this section if you have a full patient’s cart since the PSMs are mounted on the SUJ.
The da Vinci Classic PSMs are fairly easy to mount. There are 4 holes at the base of the PSM black bar. The four holes form a 2” square (2 inches ~= 5.1 cm). If you want to mount the PSM in a rigid manner, you can simply drill and thread 4 holes in an 80-20 standard plate.
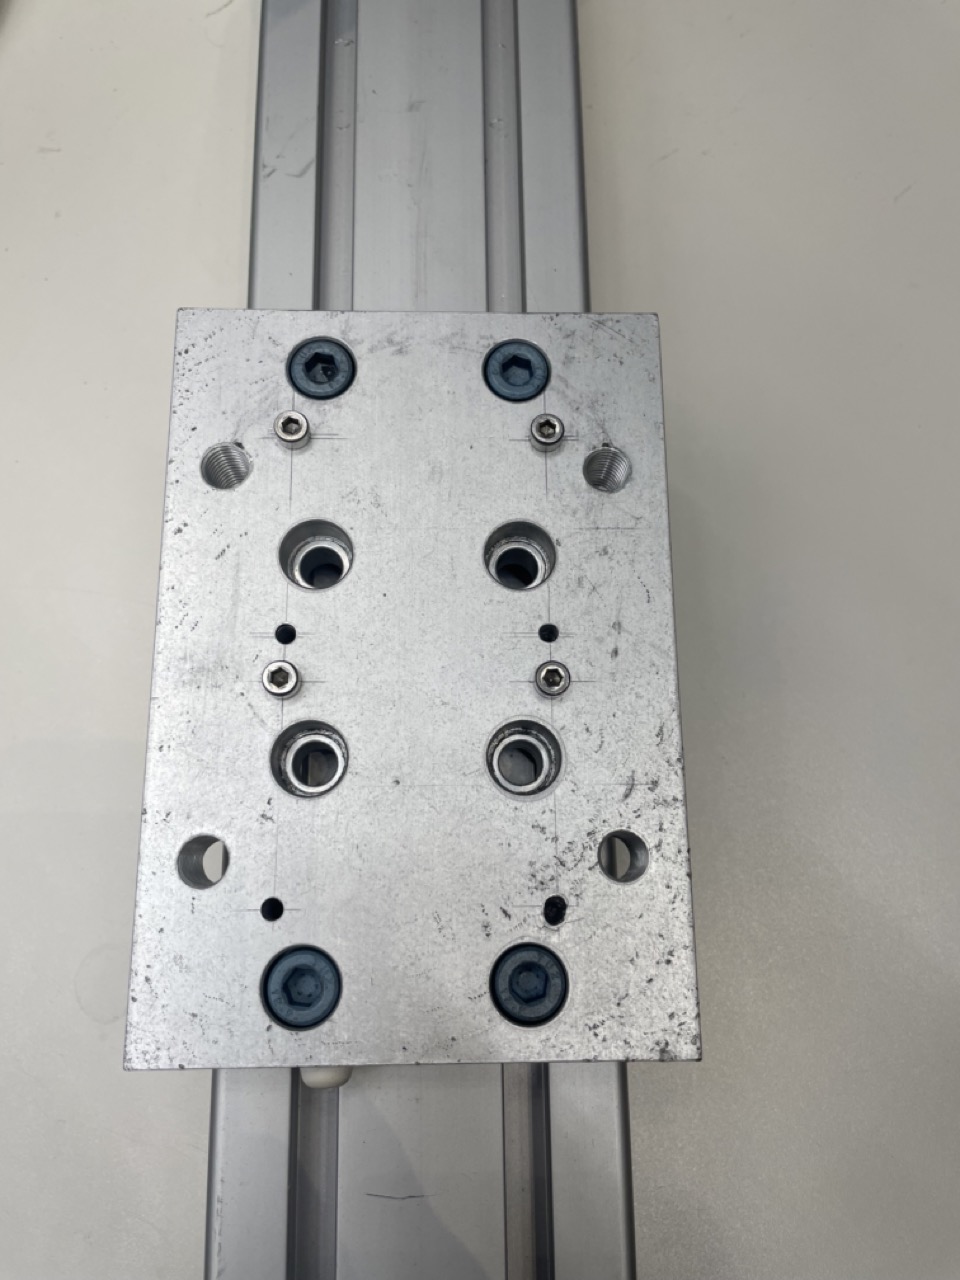
PSM Classic mounting plate for 80-20
For a clinical system, the PSMs are mounted on the passive setup joints (SUJ). These passive arms allow the user to position each arm’s RCM point at the entry point in the patient. The RCM point is physically located near the large black band on the cannulas. Ideally all the arm’s RCM points (PSMs and ECMs) should be located on the “surface” of the patient.
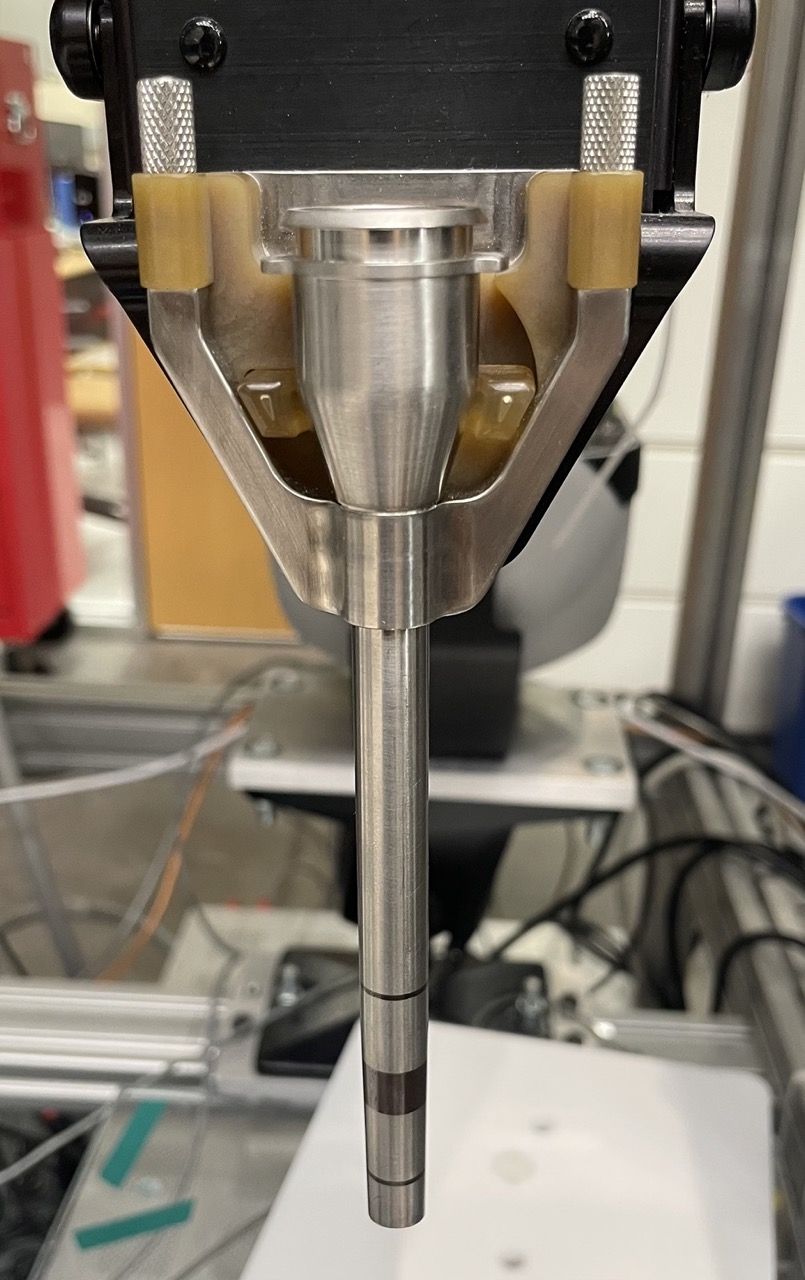
RCM point on Classic PSM cannula
The PSMs are designed for minimally invasive surgeries and their workspace is fairly limited. Therefore, it is very important to position them optimally to avoid hitting the physical joint limits. Ideally, when in zero position (i.e. each joint in the middle of their range), the instrument’s shaft should be aligned to the normal on the “surface” of the patient. To simply, one can consider that the patient is a sphere and the entry points are placed at different azimuth and altitude.
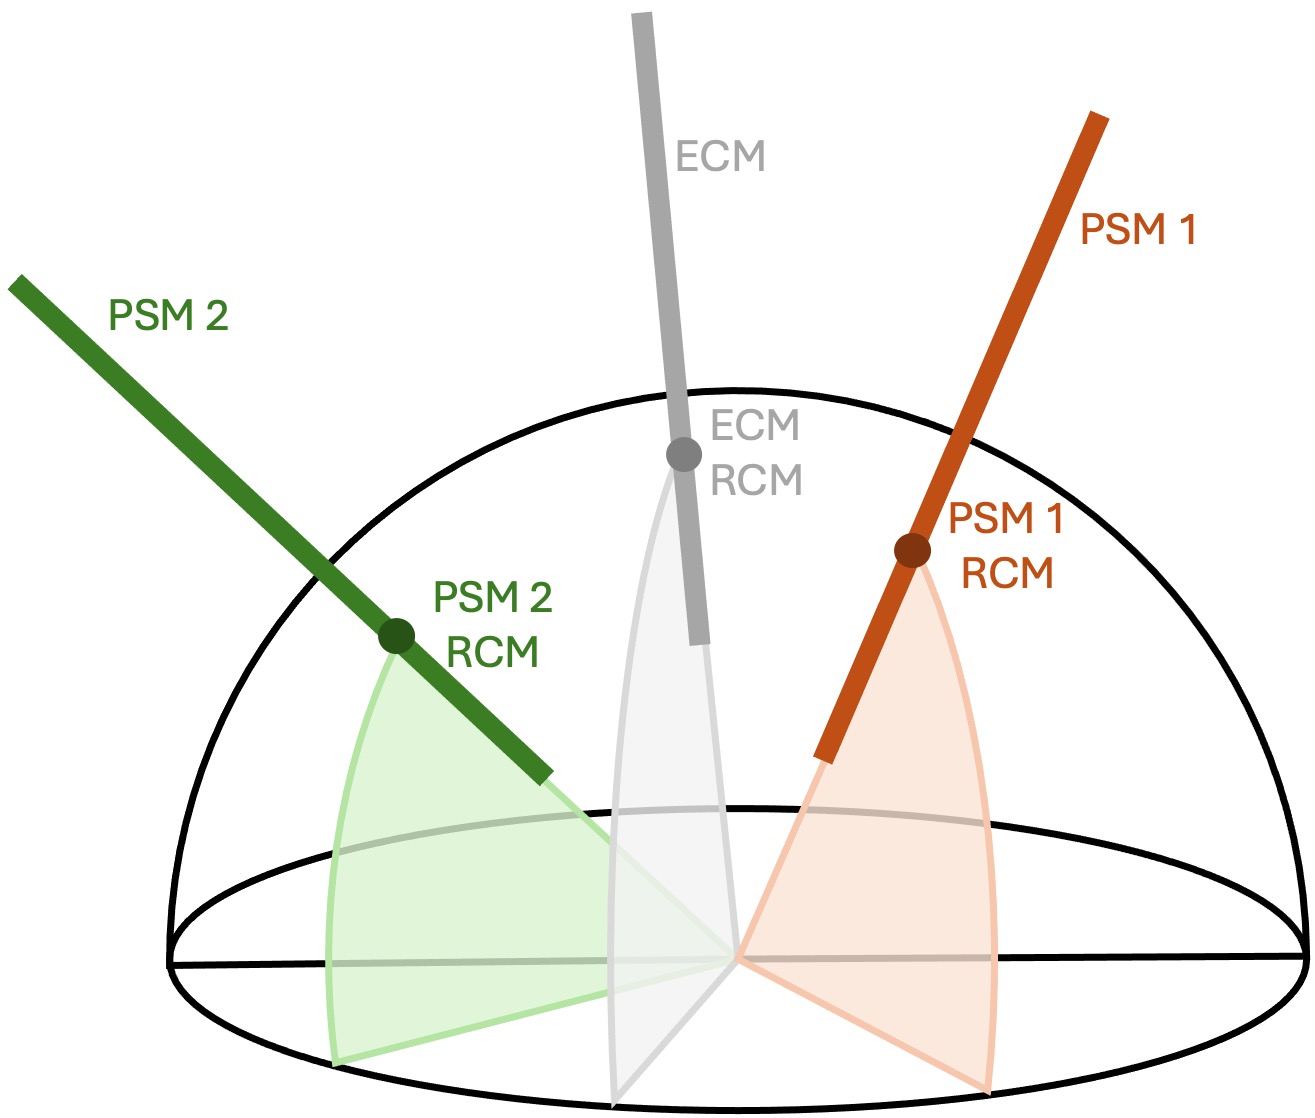
Schematic view of PSMs and ECM RCM points and base orientation
To allow all the base frame’s orientations, one can use a ball head mount for each PSM. Some groups used a Really Right Stuff BH-55 Ball Head.
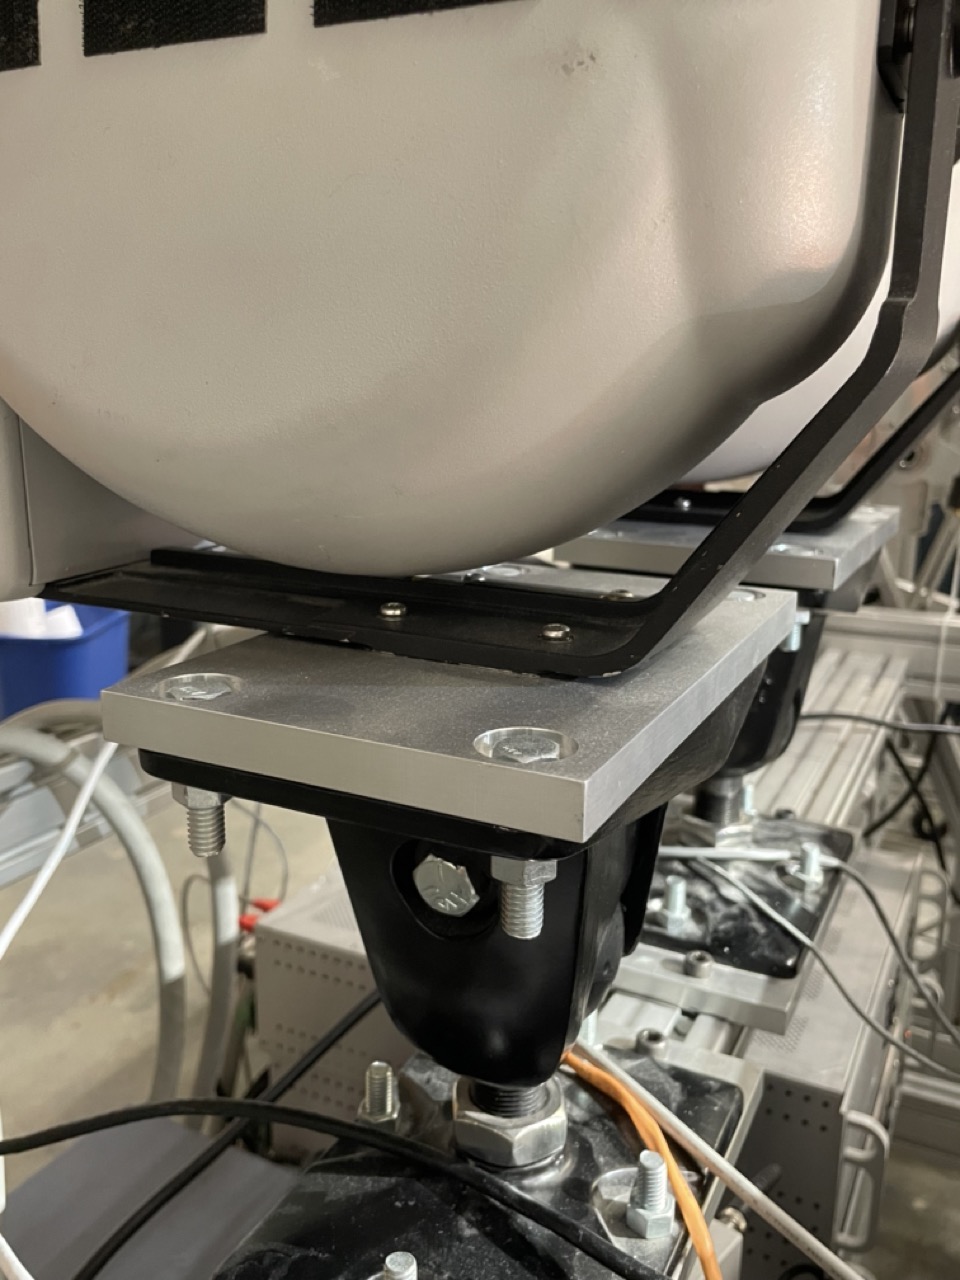
Ball head mounts used on the dVRK Classic at JHU
For further examples of mounting frames for the PSMs, check the Intuitive Research Wiki (account required).