3.4.4. SUJ
The goal is to re-use the internal cables and sensors in the SUJ passive arms for the dVRK controllers. This way all the signals from the active arms (2 D-sub connectors) can be carried all the way to the dSIB and ESSJ at the base of the patient cart.
The overall flow is shown at the bottom of the following figure. More details can be found in the dVRK electronic introduction.

dVRK Si controllers integration with SUJ (bottom)
Warning
The dSIB-Si should be connected directly to the dRAC based controller. You might have received some custom cables to connect to arm to the controller. Even though they use the same connectors, they don’t carry all the signals required with the SUJ and ESSJ. So, don’t use the custom cables between the dSIB and the controller (see also).
3.4.4.1. Preparation
We first need to remove most of the electronics from the back of the patient cart. This is required since the cables coming from the base of the column of the cart are fairly short and need to reach the dSIBs mounted directly on the back of the dVRK controllers.
Warning
Most of the cables we need to reconnect to the dVRK controllers are plugged into the 4 RACs, on the front of the patient cart. There is one lone exception, a Z-axis cable. Make sure you keep track of this cable. All needed cables come out from a cutout in the vertical column.
Note
Once you’ve set up the Si cart for the dVRK controllers, it’s possible but really difficult to go back to the original controllers.
The first step is to remove the cover (2 parts) on the back of the cart. The cover is held with 2 screws (use 3/16 hex wrench) and some pressure clips.
SUJ Si top cover overview
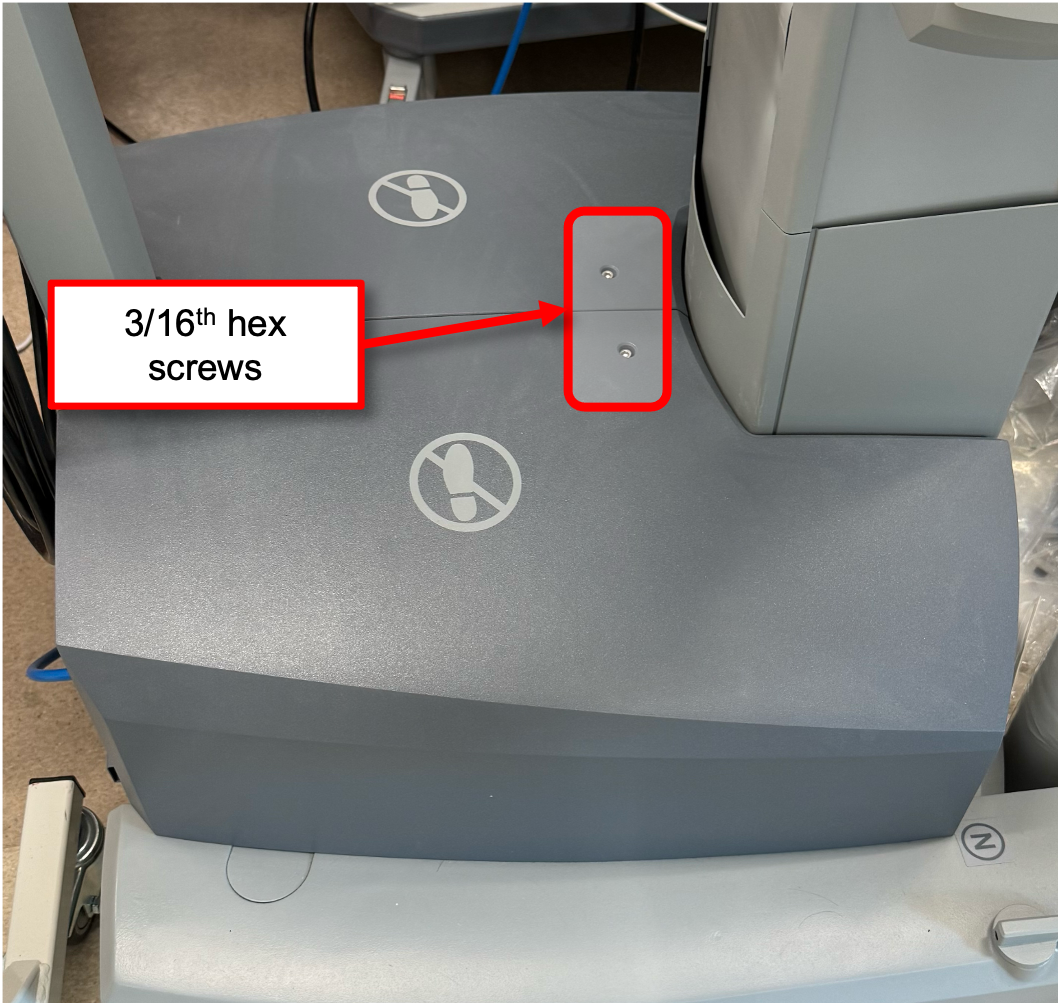
SUJ Si top cover screws
Once the screws are removed, you will need to pry out the covers. The pressure clips are fairly strong so don’t be afraid to apply some force on the cover.

SUJ Si top cover
Once the covers are removed, you should familiarize yourself with the different cables you will need to unplug from the original electronics and re-plug to the dVRK controllers. Ultimately, the RACs, back panels, bracket, cover, battery, electronics… will be removed.

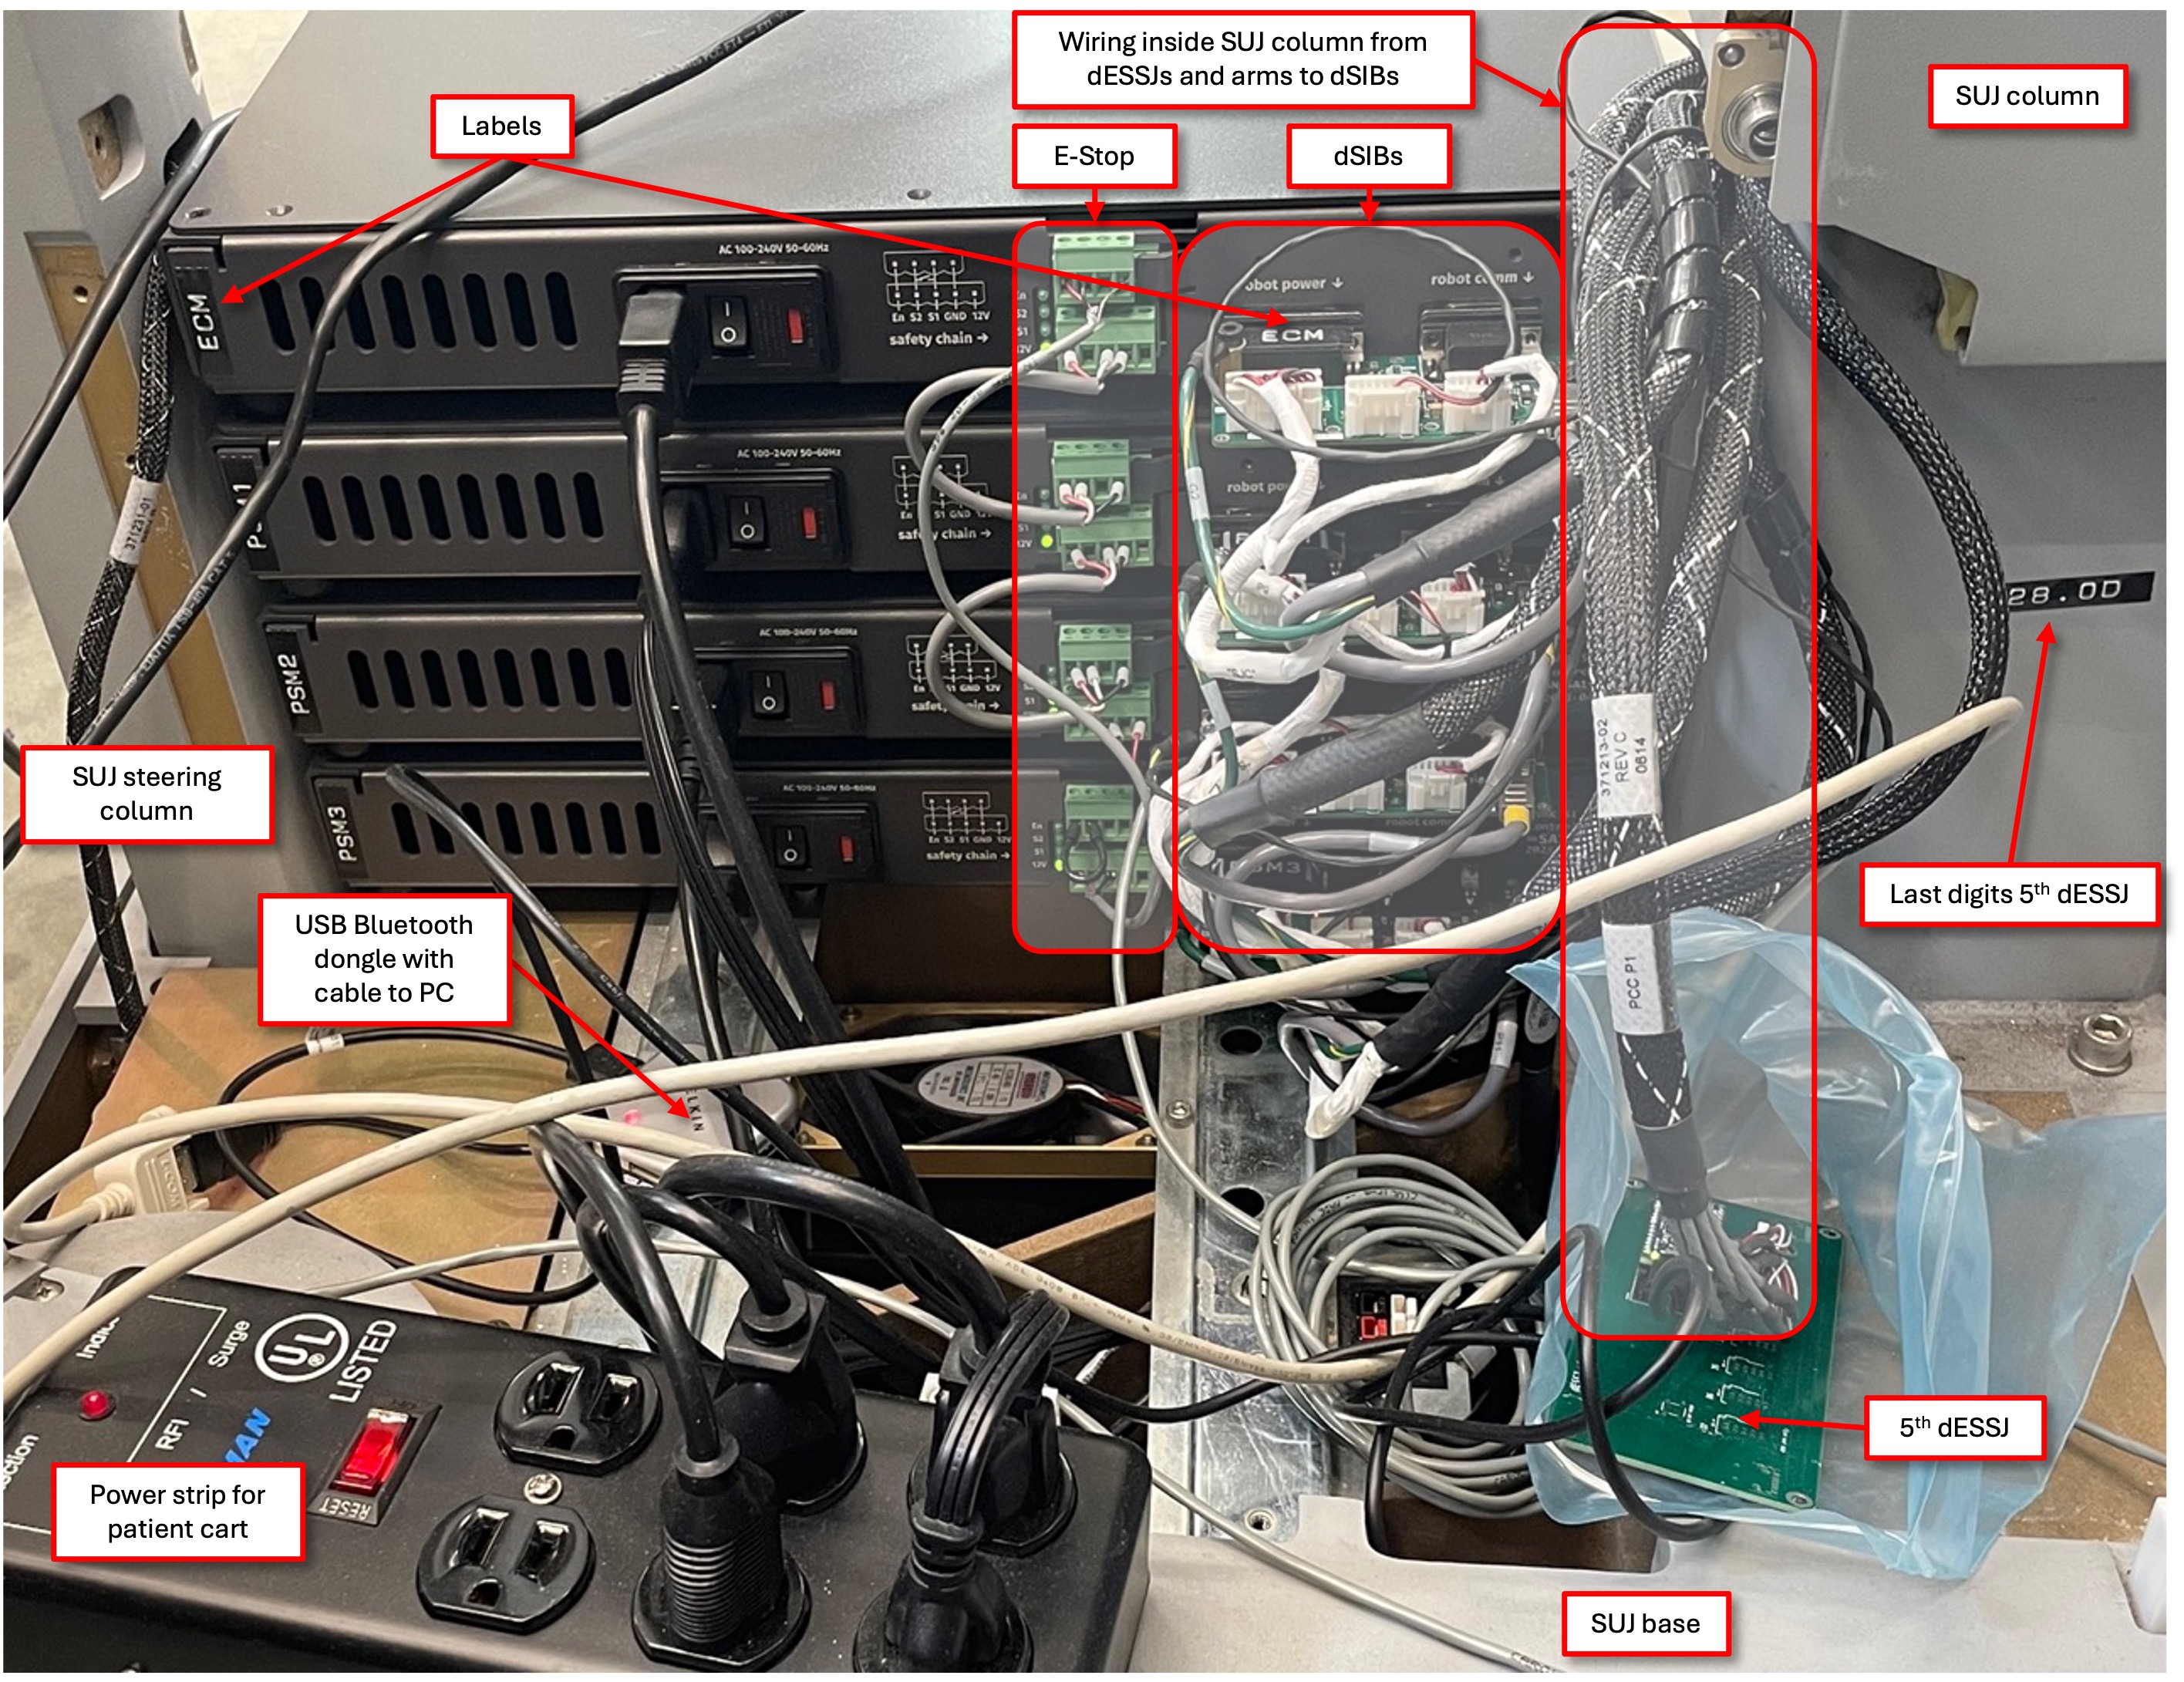
SUJ Si open, top view

SUJ Si open, front view
On the top view, you can find the “Z-AXIS” connector. Make sure you squeeze the tab to unplug it. Keep that cable aside. It will be connected to the dSIB-Z-Si.
On the front view, you can see 4 RACs, i.e., one per active arm. Their cables are labeled SJA2, SJX, SJC and SJA1. They will need to be plugged into the dSIB for the PSM2, PSM3, ECM and PSM1 respectively.
See next section for the dSIB descriptions.
On the front view, you can locate the 4 original RACs as well as all the connectors that will be connected to the dSIB on the dVRK controllers. There are 2 connectors from a bundle (white), a 2-wires black cable, a “FireWire B” cable (used for LVDS) and a grounding cable with a ring terminal. Bundle all these cables together and label with the name of the arm.
The upper “FireWire” cable (J10) and the bottom cable (J13) plugged into each RAC are not needed for dVRK.

SUJ Si active arm bundle
Caution
The FireWire cable is mounted on the back of the dRAC PCB, labeled J11. There is not much space to unplug it. We strongly recommend you detach the RAC (the whole block) from the large steel plate holding all 4 RACs, so you can unplug the cable without damaging the connector.

SUJ Si RAC connections
Once you’ve disconnected all the cables we need to preserve for the dVRK, you can remove all the electronics, bracket, battery… from the patient cart. Ideally, there should be nothing above the “shoulders” so you have a somewhat flat surface to stack the 4 dVRK-Si controllers.
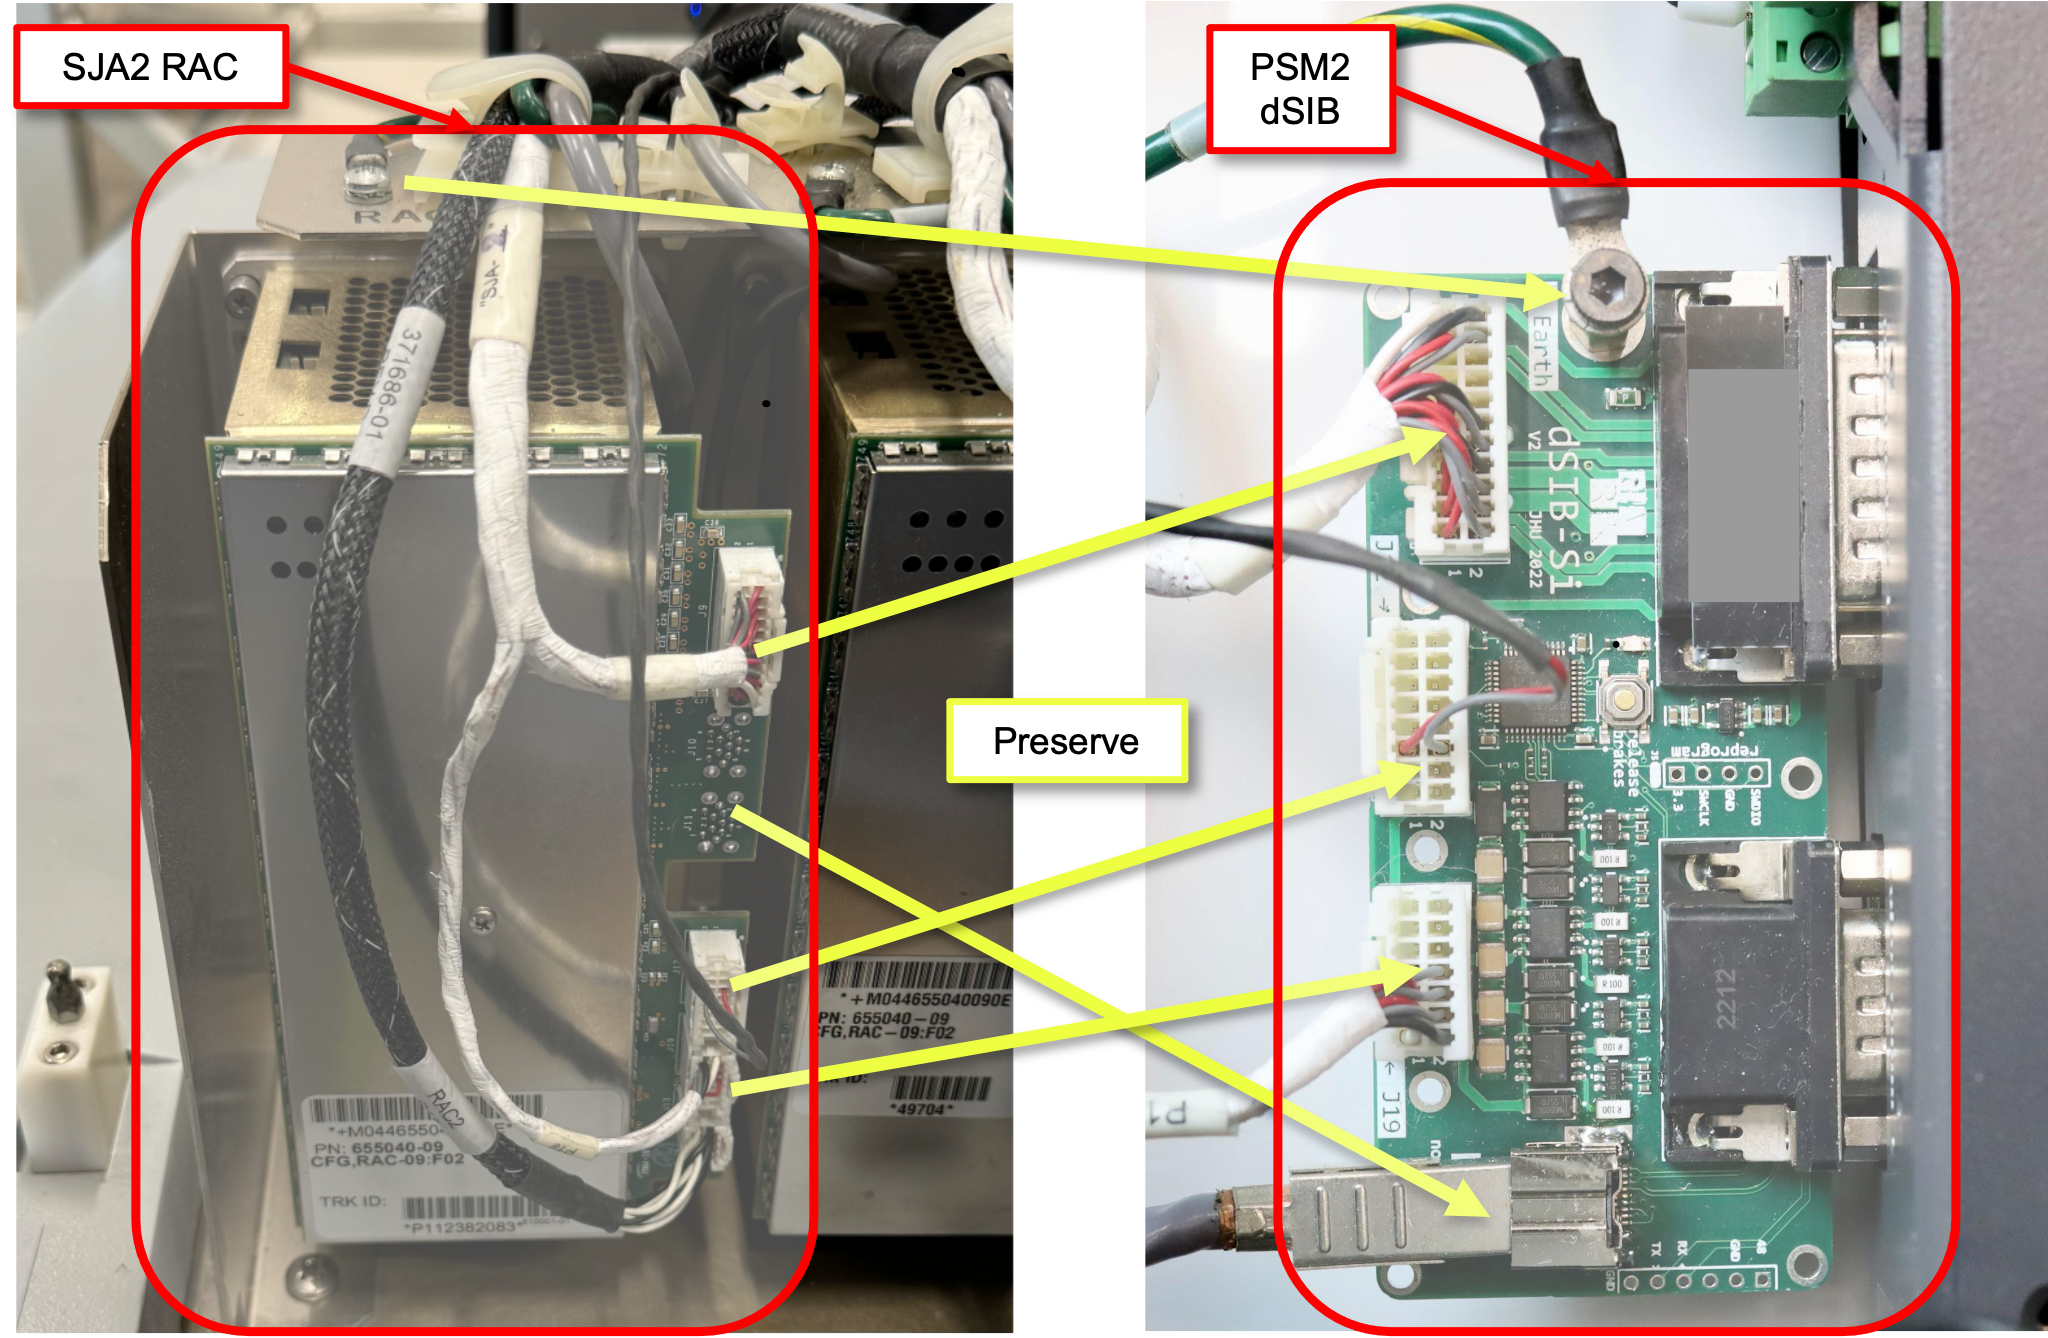
SUJ Si mapping from RAC to dSIB
3.4.4.2. dSIB-Si
For a full system, you will need 4 dSIB adapter boards, one for each dVRK-Si controller (da Vinci Setup Interface Board). These boards are plugged between the dVRK-Si controllers and the original cables coming at the base of the SUJ column. These boards allow us to re-use the internal cables in the SUJ arms. The cables coming from the column are unfortunately very short, so you will have to remove the cover on the back of the SUJ as well as most of the existing electronics at the base of the patient cart. The dSIB boards are also used to power the SUJ brakes.
3.4.4.3. JHU setup
The following images show the dVRK-Si at Johns Hopkins. We strongly recommend putting labels everywhere to avoid confusing cables, controllers and boards. The labels should have the arm name and, when needed, the arm serial number.

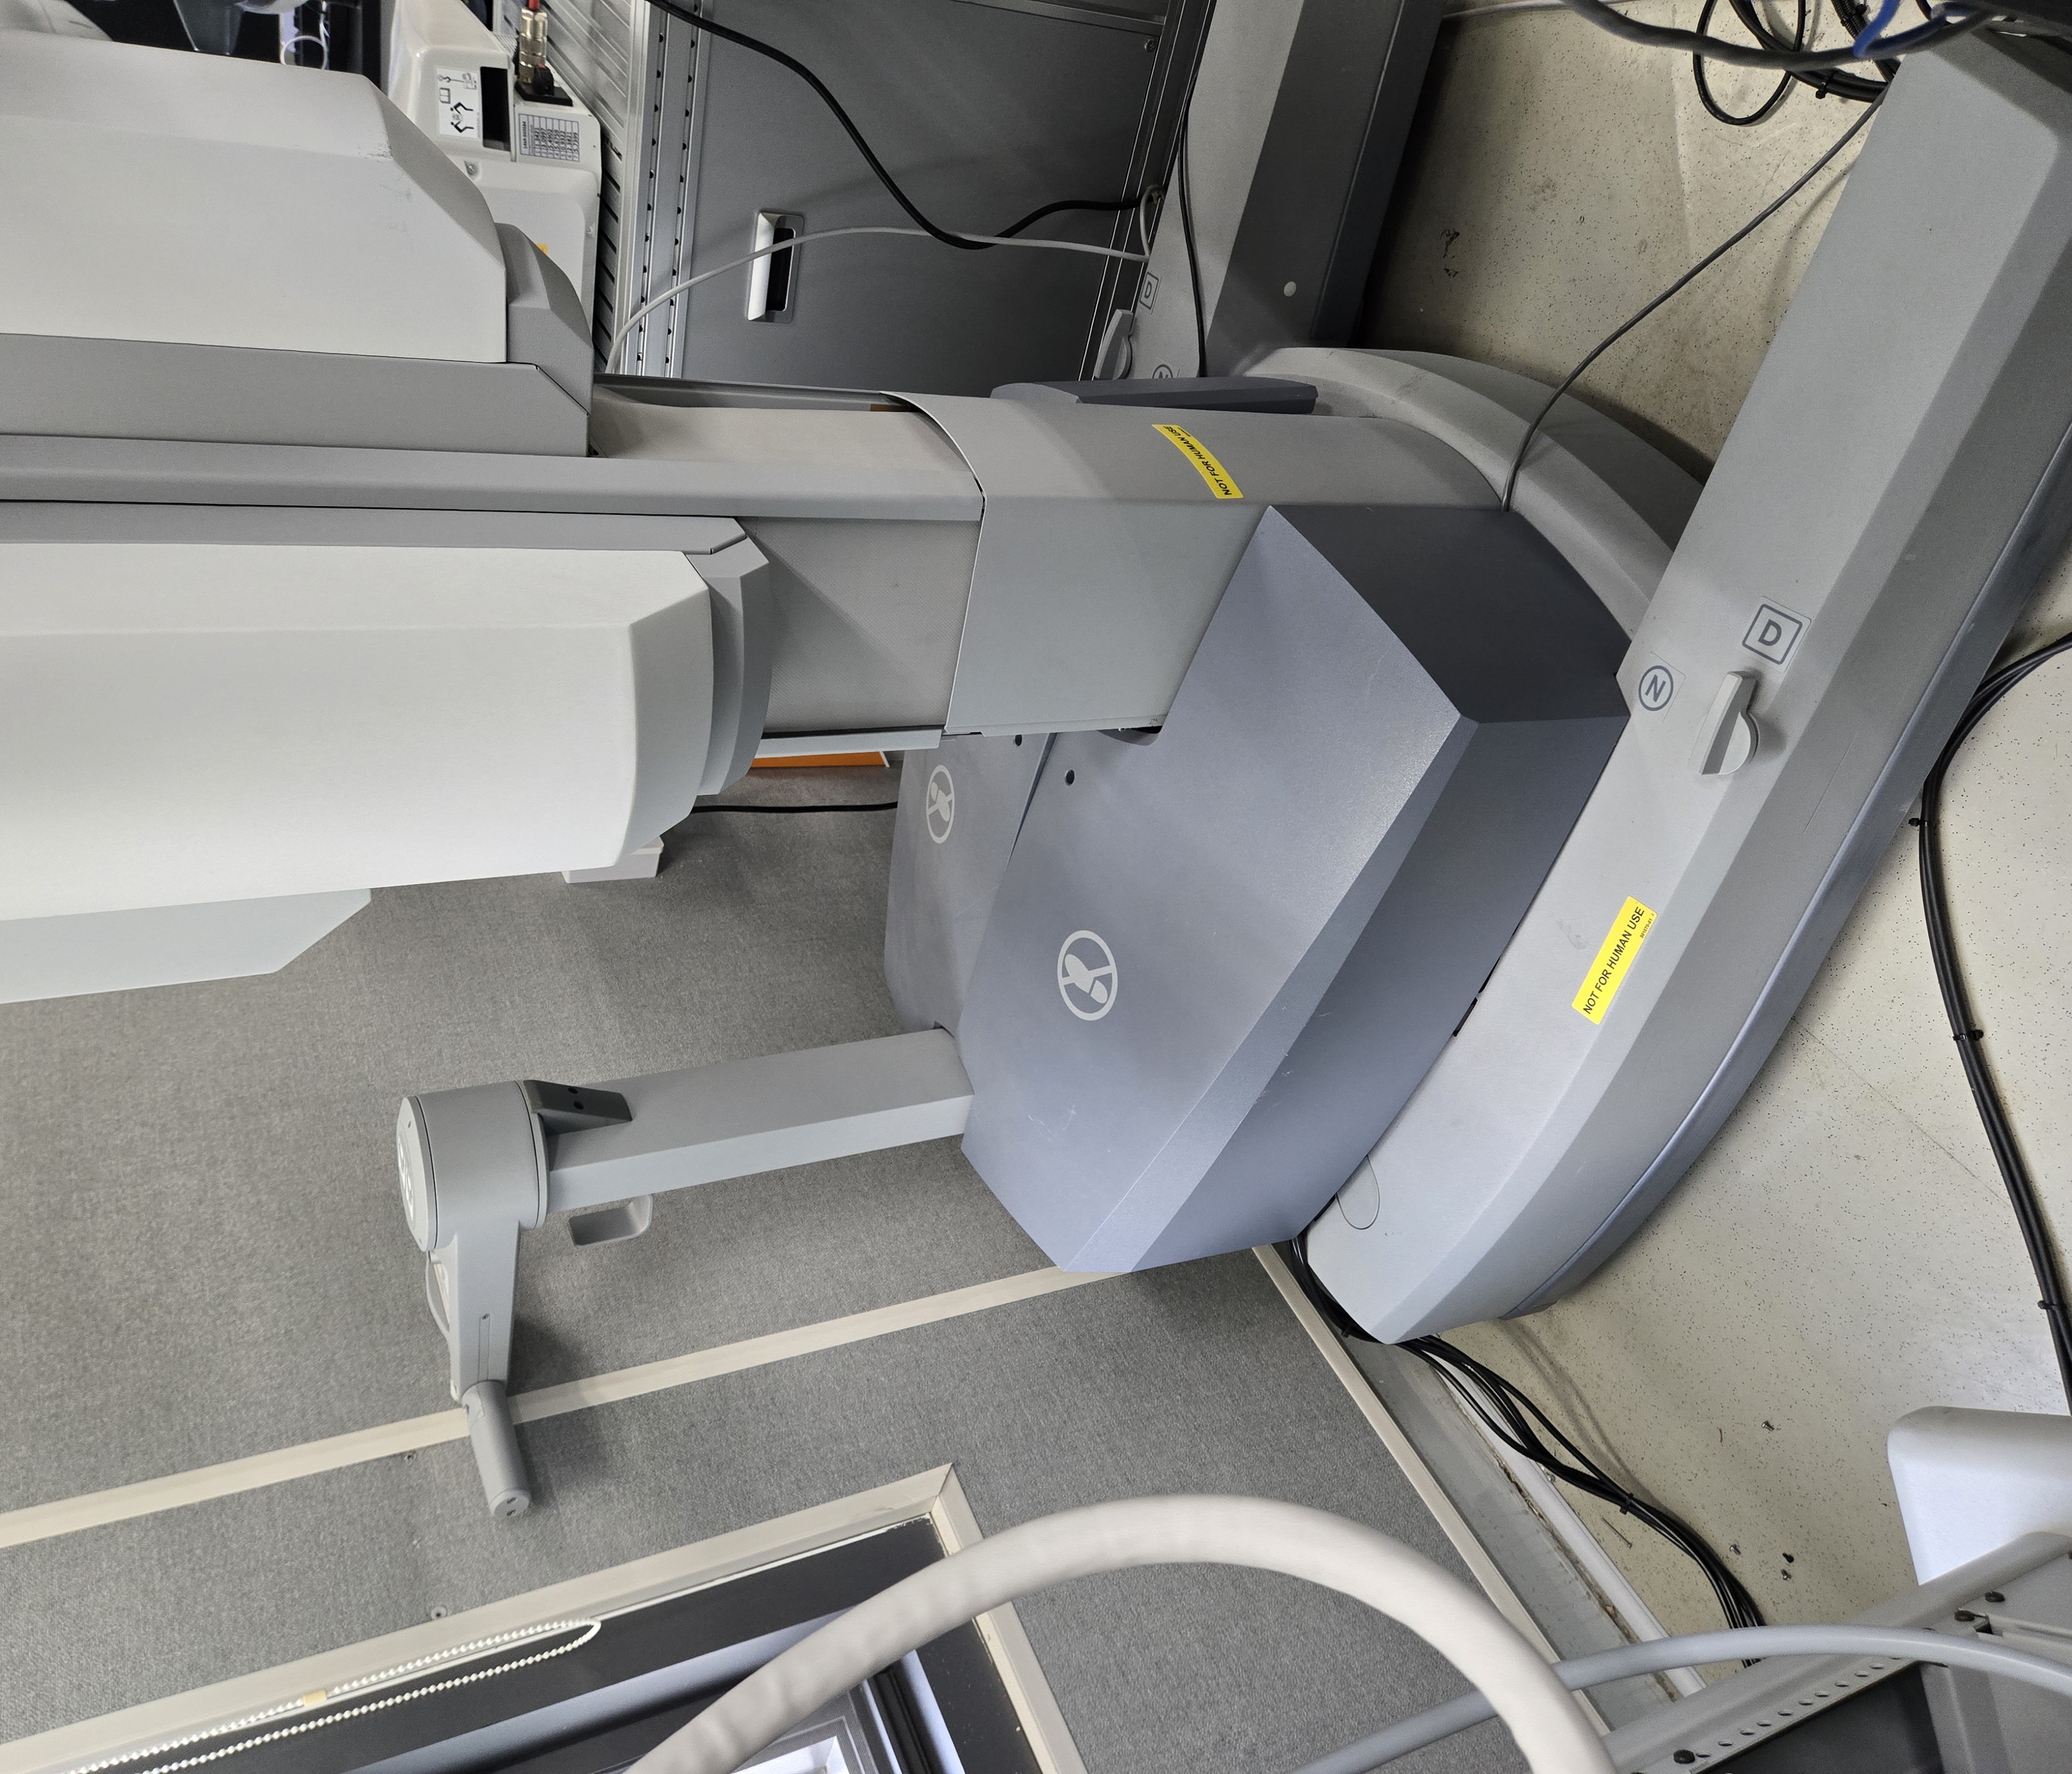
Side view of the patient’s cart with dVRK controllers.
In the picture above, the controllers are very low on the cart. This is the only way to connect the existing, short cables from the SUJ columns to the dSIB mounted on the back of the dVRK controllers. You will unfortunately have to remove most of the old electronic components of the original patient’s cart to fit the dVRK controllers.

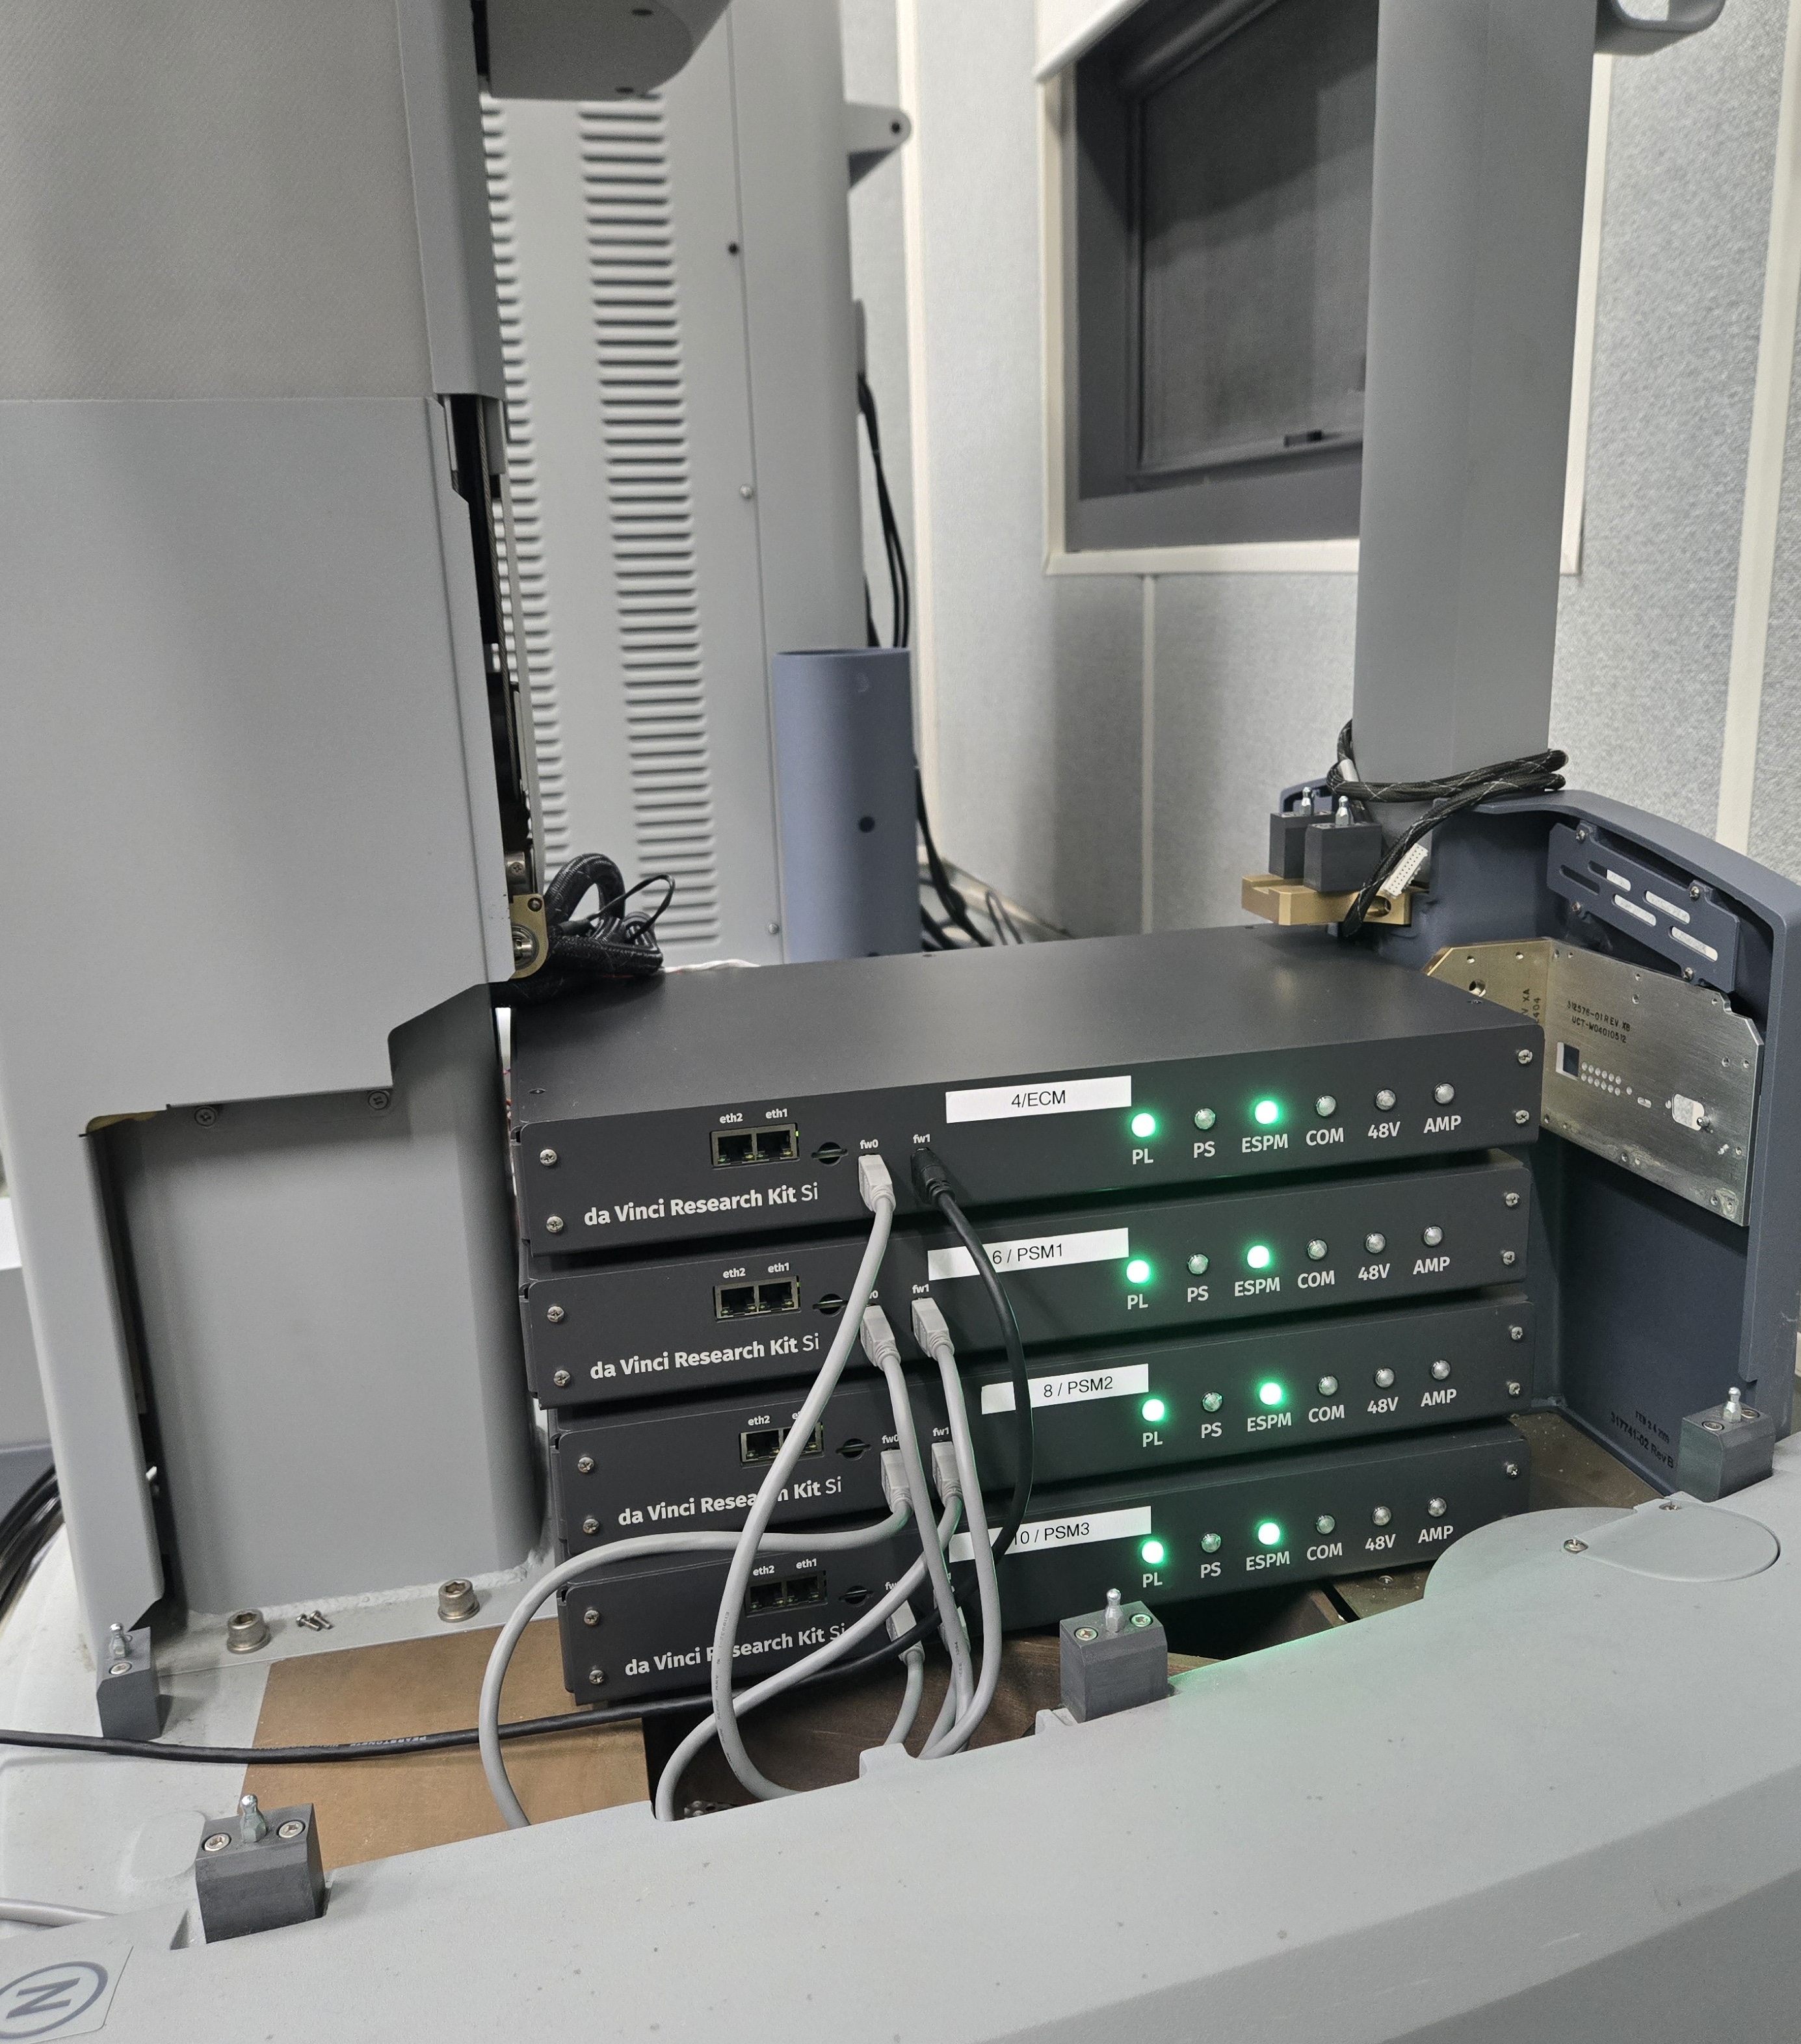
Stack of dVRK-Si controllers with data cables (front)
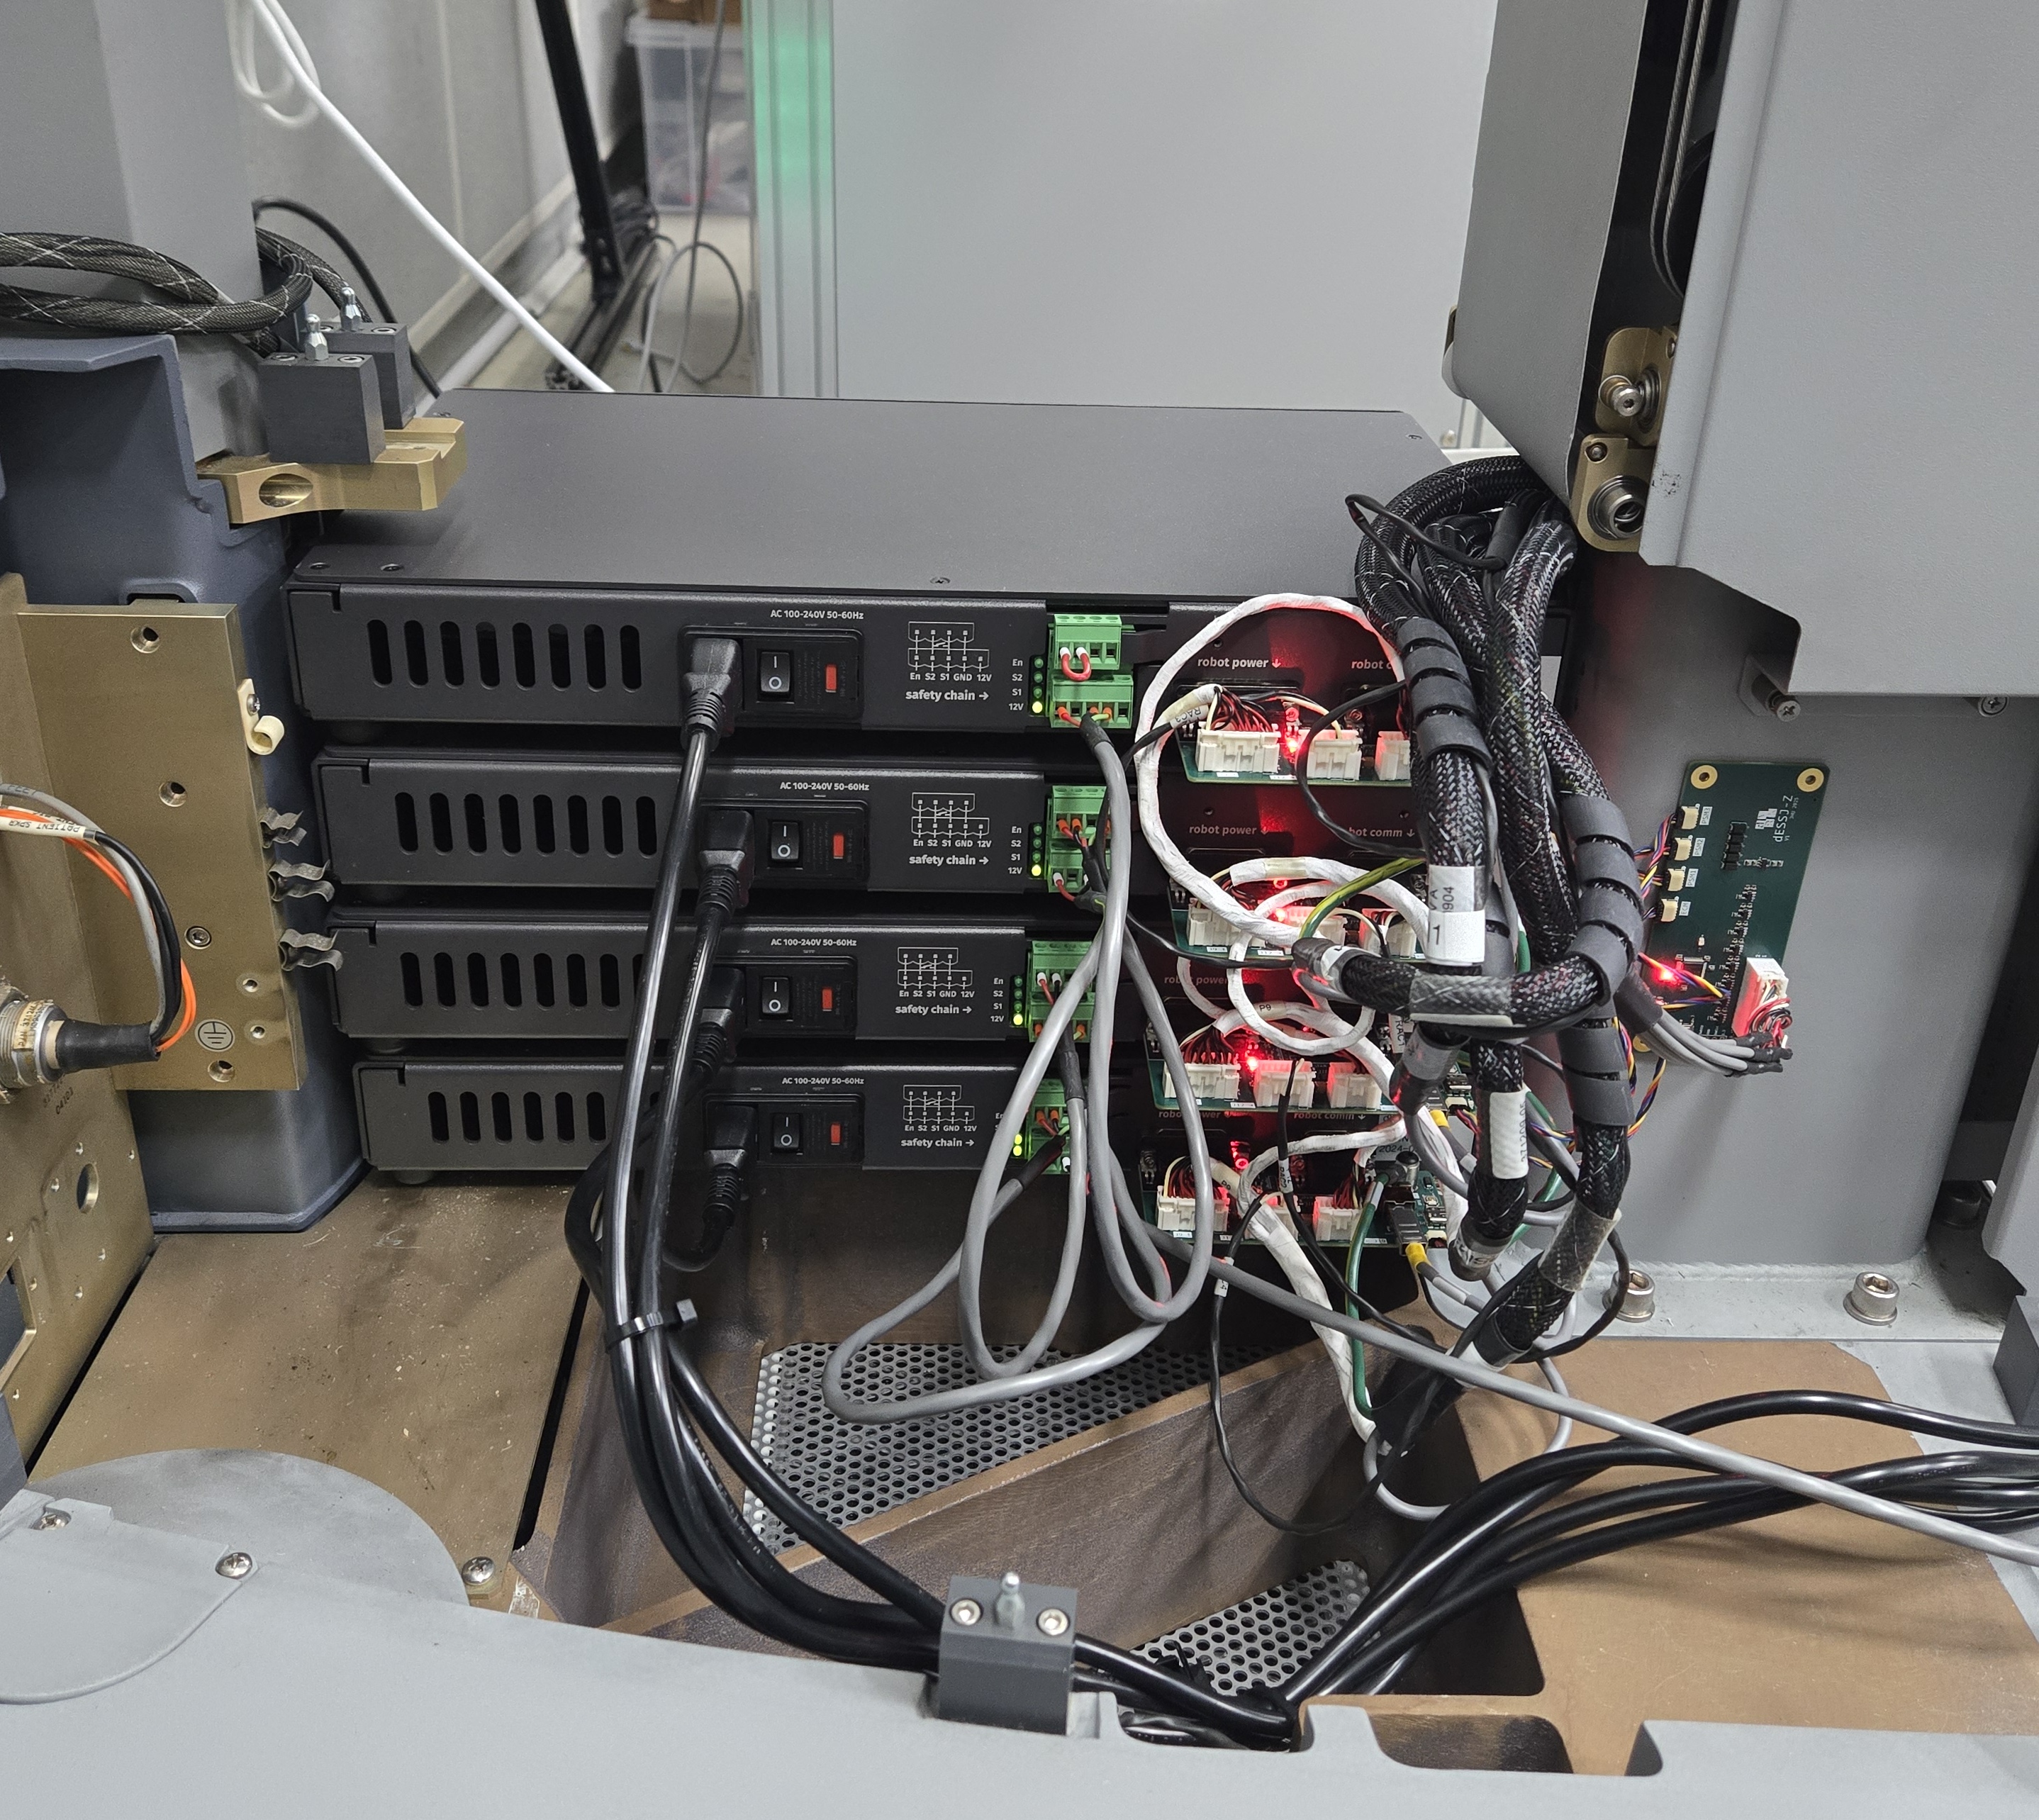
Stack of dVRK-Si controllers with dSIB-Si (back)
Note
The dSIBs are mounted directly on the back of the controllers, don’t use any extension cables between the dSIB and the controller!

Label on each active Si arm
3.4.4.4. DGIST setup
The following images show the dVRK-Si at DGIST.
PSM and ECM Si controllers, front with FireWire chain
PSM and ECM Si controllers, back with dSIB-Si and dSIB-Z-Si